There’s something undeniably satisfying about a perfectly grilled sandwich—crispy on the outside, warm and gooey on the inside, with those tell-tale char marks that hint at deliciousness. If you’re yearning to recreate that café experience in your own kitchen, finding The Best Panini Press is your ticket. These versatile countertop appliances transform ordinary ingredients into extraordinary meals, making them a beloved staple for breakfast, lunch, dinner, and even dessert.
What is a Panini Press and Why You Need One?
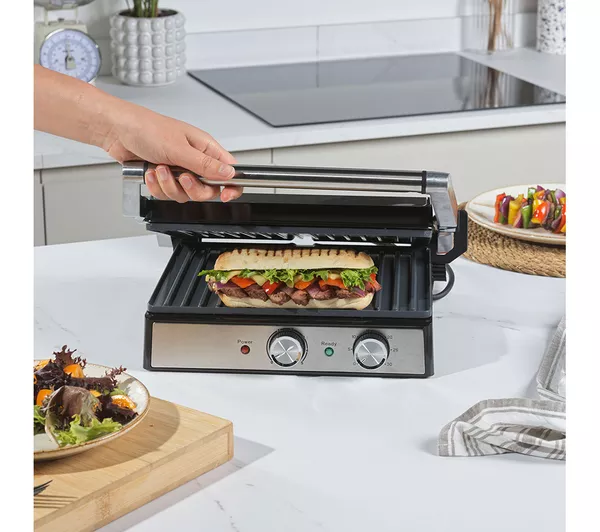
At its core, a panini press is an electric grill with two heated plates that close over food, cooking both sides simultaneously. While it’s often called a sandwich press, indoor grill, or contact grill, its primary mission is to toast and warm sandwiches to perfection, imparting those signature grill marks. Beyond sandwiches, many modern presses offer impressive versatility, effectively doubling as a griddle or indoor grill for a variety of foods.
Why should you add one to your kitchen arsenal? For starters, they make quick work of meals, delivering a hot, crispy sandwich in minutes. They’re also incredibly adaptable, allowing you to experiment with countless fillings and bread types. Plus, with a panini press, you’re in control of your ingredients, making it easier to whip up healthier, homemade alternatives to takeout. The convenience and speed make it a true kitchen game-changer.
The History and Evolution of the Panini Press
The humble panini, meaning “small bread” in Italian, has a rich history rooted in Italian cafés. Originally, paninis were simply grilled sandwiches made with various fillings and pressed using a heavy object on a stovetop grill. It wasn’t until the late 20th century that dedicated electric panini presses, or contact grills, began to gain popularity in American homes. Early models, like the iconic George Foreman Grill, revolutionized home cooking by offering a fast, low-fat way to grill everything from burgers to chicken breasts.
Over the past few decades, the technology behind these machines has seen significant improvements. Modern presses boast features like adjustable temperatures, removable and reversible plates, and sophisticated floating-hinge covers that ensure even cooking and accommodate thicker sandwiches. They’ve evolved from single-purpose gadgets into multi-functional kitchen workhorses, ready to tackle much more than just a simple grilled sandwich.
Popular Types of Panini Presses and How to Choose
When it comes to selecting the best panini press, you’ll encounter a range of options, each with its own advantages. Most fall into two main categories: contact presses and open-flat models. Contact presses are designed primarily for closing over food, while open-flat models can extend 180 degrees to serve as a griddle or indoor grill, offering greater versatility.
Here are key features to consider when making your choice:
- Plate Type: Look for nonstick cooking surfaces for easy food release and quick cleanup. Many presses feature reversible plates with both ridged (grill) and flat (griddle) sides, allowing for different cooking styles. Some of the best panini presses, like the Cuisinart Griddler Elite, feature deep grooves that create distinct grill marks and channel away moisture.
- Removable and Dishwasher-Safe Plates: This is a major convenience factor. Presses with detachable plates, such as the Cuisinart 5-in-1 Electric Griddler, are significantly easier to clean, often being dishwasher-safe. Fixed plates require more meticulous hand-wiping.
- Adjustable Temperature Control: While some budget models only have an on/off switch, adjustable temperature settings are crucial for versatility. They allow you to fine-tune the heat for different foods, from a delicate grilled cheese to a robust burger. High-end models might even offer independent temperature controls for the top and bottom plates.
- Floating Hinge: A good floating hinge allows the top plate to rest evenly on top of sandwiches of varying thickness, applying uniform pressure without squishing the fillings out. This is essential for achieving a consistent toast across your panini.
- Size and Storage: Consider your counter space and storage availability. Larger models, while great for families, can be bulky. Compact options, like the Chefman Electric Panini Grill, are perfect for smaller kitchens.
- Additional Features: Some presses include built-in timers, drip trays for grease, or even compatible waffle plates (often sold separately) to further expand their functionality.
“Choosing the right panini press is like picking a co-chef for your kitchen,” says Chef Anya Sharma, a renowned culinary expert. “It needs to fit your cooking style, your space, and your appetite for adventure. Prioritize versatility and easy cleanup, and you’ll never regret the investment.”
For those prioritizing durability and a sleek aesthetic, a stainless steel panini press can be an excellent choice, often combining robust construction with modern features.
How to Use a Panini Press Effectively
Mastering your panini press is simpler than you might think. Follow these steps for consistently delicious results:
- Preheat Properly: Always preheat your panini press according to the manufacturer’s instructions, usually for 5-10 minutes. A hot press ensures quick cooking and those coveted grill marks. If your press has adjustable temperature, set it to medium-high for most sandwiches.
- Prepare Your Panini: Assemble your sandwich with your desired bread, fillings, and spreads. A light brushing of olive oil or butter on the outside of the bread will enhance crispiness and flavor. Avoid using nonstick cooking sprays, as they can leave a sticky residue on the plates over time.
- Place and Press: Carefully place your assembled panini onto the bottom plate. Gently lower the top plate, allowing the floating hinge to adjust to the sandwich’s thickness. Avoid forcing the lid down, especially if you have a delicate sandwich.
- Cook to Perfection: Cook until the bread is golden brown and crispy, and the fillings are warm and melted, typically 3-6 minutes depending on the heat and thickness of your sandwich.
- Remove and Serve: Use a non-metal spatula to remove your panini. Let it rest for a minute before slicing and serving to allow the fillings to set slightly.
- Clean Up: Once cooled, clean the plates. If removable, wash them in the sink or dishwasher. For fixed plates, wipe them down with a damp cloth and mild dish soap, using a plastic scraper for stubborn bits.
Basic and Creative Panini Recipes
The world of panini is vast and exciting! Here are a few ideas to get you started:
Classic Grilled Cheese Panini
The ultimate comfort food, elevated.
- Ingredients: Sliced sourdough or white bread, American or cheddar cheese, butter.
- Method: Butter the outsides of the bread. Layer cheese between the slices. Grill until golden and cheese is perfectly gooey.
Turkey, Provolone, and Pesto Panini
A taste of Italy in every bite.
- Ingredients: Ciabatta bread, sliced turkey breast, provolone cheese, basil pesto, roasted red peppers (optional).
- Method: Spread pesto on one side of the ciabatta. Layer turkey, provolone, and peppers. Grill until bread is toasted and cheese is melted.
Mediterranean Veggie Panini
A vibrant and healthy option.
- Ingredients: Whole wheat focaccia, grilled zucchini and eggplant, roasted red peppers, feta cheese, spinach, a drizzle of balsamic glaze.
- Method: Layer ingredients on focaccia. Grill until vegetables are warm and bread is crisp.
Sweet Banana & Nutella Panini
A delightful dessert or indulgent breakfast.
- Ingredients: Brioche or challah bread, Nutella, sliced bananas.
- Method: Spread Nutella on one slice of bread. Top with banana slices and the other bread slice. Grill until golden and Nutella is slightly melted.
Tips and Tricks for Making the Perfect Panini
Achieving panini perfection is all about the details:
- Choose the Right Bread: Sturdy breads like ciabatta, focaccia, sourdough, or even good quality white bread work best as they can withstand the pressure and create a satisfying crunch.
- Don’t Overfill: While tempting, too many fillings can prevent even cooking and make your panini fall apart. Aim for balanced layers.
- Butter or Oil for Crispness: A thin layer of butter or olive oil on the outer surfaces of your bread is key to a golden, crispy crust.
- Vary the Pressure: Some recipes benefit from a lighter touch, especially if you want a less dense sandwich. Others, like a Cubano, can handle more firm pressing.
- Consider Ingredients: Pre-cooked meats and vegetables work best as the panini press primarily heats and crisps, not fully cooks through raw ingredients (unless specified for thicker cuts).
Benefits of Making Panini at Home and Healthy Options
Making paninis at home offers several advantages. It’s often more cost-effective than buying them from a café, especially if you’re feeding a family. You also have complete control over ingredients, allowing you to use fresh, high-quality components and avoid unwanted additives.
For those focusing on healthy eating, a panini press can be a fantastic tool:
- Lean Proteins: Opt for grilled chicken, turkey, or lean ham.
- Abundant Vegetables: Load up your panini with fresh spinach, tomatoes, roasted bell peppers, mushrooms, or zucchini.
- Whole Grains: Choose whole wheat or whole grain breads for added fiber.
- Healthy Fats: Use a light brushing of olive oil instead of excessive butter.
- Portion Control: Making your own allows you to manage portion sizes more effectively.
“The beauty of homemade panini lies in its customizability,” explains Nutritionist Laura Chen. “You can easily swap out high-fat cheeses for lower-fat alternatives, add extra greens, or use a whole-grain loaf, turning a simple sandwich into a powerhouse of nutrition without sacrificing flavor.”
Panini Serving and Pairing Ideas
A perfect panini can be a meal in itself, but it also pairs wonderfully with complementary dishes.
- Soups: A classic pairing, a warm panini is excellent alongside a creamy tomato soup, a hearty minestrone, or a light vegetable broth.
- Salads: A fresh, crisp side salad with a vinaigrette dressing cuts through the richness of the panini beautifully.
- Dips: Serve with a side of marinara sauce, a rich aioli, or a zesty salsa for dipping.
- Sides: Crispy sweet potato fries, a fruit salad, or even some pickled vegetables can complete the meal.
- Drinks: Pair with iced tea, lemonade, sparkling water, or, for an authentic Italian touch, a simple espresso or cappuccino.
Frequently Asked Questions
What’s the difference between a panini press and a sandwich maker?
While often used interchangeably, a panini press typically creates grilled lines on the bread and is more versatile for various food thicknesses due to its floating hinge. A traditional sandwich maker usually seals the edges and cuts the sandwich into triangles, often with no grill marks. However, many modern panini presses are often called “sandwich makers” or “sandwich presses” due to their broad use.
Can I cook other foods on a panini press?
Absolutely! Many of the best panini presses are designed for multitasking. You can grill burgers, chicken breasts, fish fillets, quesadillas, and even vegetables like asparagus or bell peppers. Models that open flat can even be used as electric griddles for pancakes or eggs.
How do I clean my panini press?
Cleaning depends on the model. For presses with removable, dishwasher-safe plates, simply pop them out and wash them. For fixed plates, wipe them with a damp cloth and mild dish soap once the unit has cooled. Always refer to your appliance’s manual for specific instructions and avoid abrasive cleaners or metal utensils that could damage the nonstick coating.
What kind of bread is best for panini?
Sturdy, dense breads are ideal because they can withstand the heat and pressure without becoming overly thin or soggy. Ciabatta, focaccia, sourdough, country bread, and even robust sliced sandwich bread work well.
Is a panini press worth it?
For many, a panini press is a highly worthwhile investment. Its ability to quickly create delicious, crispy sandwiches and its versatility for grilling other foods make it a valuable addition to any kitchen, saving time and offering healthier meal options at home.
Conclusion
The quest for the best panini press leads to a world of culinary possibilities. From quick and easy weeknight dinners to gourmet weekend brunches, this indispensable appliance offers unparalleled convenience and taste. Whether you choose a high-end model with all the bells and whistles or a reliable budget-friendly option, the joy of a perfectly pressed sandwich is within your reach. Experiment with diverse ingredients, savor the crispy textures, and let your panini press inspire a love for grilled creations that extends far beyond just sandwiches. Happy pressing!