Life moves fast, and often, our kitchens are bustling hubs of activity, or perhaps, compact havens where every inch of counter space is precious. Enter the Single Panini Press – a small but mighty appliance designed to bring the joy of perfectly grilled sandwiches and more into your daily routine. Forget soggy, unevenly toasted bread; with a dedicated single panini press, you’re just minutes away from crispy exteriors, warm fillings, and those irresistible grill marks that make every bite a delight.
What Exactly is a Single Panini Press and Why Should You Own One?
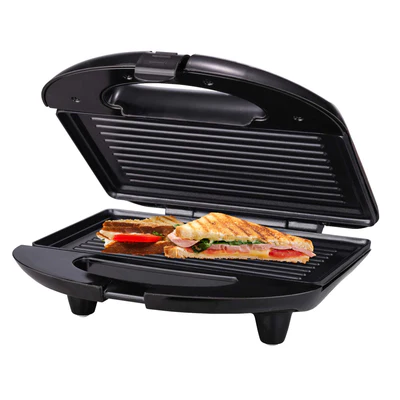
At its core, a single panini press is a countertop electric grill that simultaneously heats and presses food from both the top and bottom. Unlike a traditional toaster, it compacts your sandwich, melding flavors and creating that signature flattened, toasted result. The “single” aspect emphasizes its compact footprint and capacity, typically designed for one or two sandwiches, making it an ideal choice for individuals, couples, small families, or anyone with limited kitchen space. It’s more than just a sandwich maker; it’s a versatile tool that saves time and elevates simple ingredients into gourmet experiences. This appliance quickly becomes indispensable for those seeking convenience without compromising on quality or taste.
The Evolution of the Panini Press: From Simple Grills to Culinary Companions
The concept of pressing food between hot plates isn’t new, but the modern electric panini press gained widespread popularity in the late 1990s and early 2000s, often seen as an evolution of “fat-reducing” indoor grills. Initially, these machines were fairly basic, focusing on grilling sandwiches and meats. Over the decades, however, manufacturers refined their designs, incorporating features like adjustable temperature controls, floating hinges that accommodate varying sandwich thicknesses, and removable, non-stick plates for effortless cleaning. The shift has been towards greater versatility, transforming the humble panini press into a multipurpose appliance capable of much more than just sandwiches. Today’s single panini press models embody this evolution, offering sophisticated performance in a compact form factor, catering to modern kitchen needs and culinary curiosities.
Choosing Your Perfect Single Panini Press: Key Features to Consider
Selecting the right single panini press means finding one that fits your lifestyle and cooking preferences. While all aim to deliver that delicious pressed sandwich, key features differentiate the best from the rest.
Electric vs. Manual Panini Presses
Most single panini presses are electric, offering consistent heat and ease of use. However, some traditionalists might prefer a manual cast iron press, which is heated on a stovetop. Electric models are generally more convenient, allowing for set-it-and-forget-it cooking within minutes.
Size and Capacity
For a “single” press, you’re looking for something that comfortably fits one, or perhaps two, standard-sized sandwiches without consuming excessive counter space. Dimensions matter for storage, especially in smaller kitchens or dorm rooms. Pay attention to the cooking surface area to ensure it meets your typical needs.
Plate Type: Smooth or Ridged?
Panini presses come with either smooth or ridged (grill) plates, and sometimes even reversible options.
- Ridged plates: Provide those iconic grill marks and help drain fat. Great for a classic grilled look.
- Smooth plates: Offer more uniform toasting and better contact across the entire sandwich, often recommended if your primary use is sandwiches.
Temperature Control and Ready Indicators
The best single panini press models offer adjustable temperature settings, allowing you to customize the heat for different ingredients – from delicate breads to thicker meats. A “ready” indicator light is a simple yet invaluable feature, signaling when the press has preheated to the optimal temperature, preventing undercooked or unevenly toasted results.
Floating Hinge and Adjustable Height
A floating hinge is crucial, as it allows the top plate to adjust and rest evenly on sandwiches of varying thicknesses, ensuring uniform pressure and cooking. Some presses also feature height adjustment latches, which can be useful for open-face melts or thicker paninis.
Non-Stick Coating and Easy Cleaning
Nobody enjoys scrubbing burnt cheese. Look for high-quality non-stick plates. Removable, dishwasher-safe plates are the ultimate convenience for cleanup, though many non-removable surfaces can be easily wiped down with a damp cloth once cooled. Similar to a panini press for toaster, effortless cleaning extends the life of your appliance.
Mastering Your Single Panini Press: A Step-by-Step Guide
Making a perfect panini is surprisingly simple. Follow these steps to unlock the full potential of your single panini press:
- Preparation is Key: Gather all your ingredients and assemble your sandwich before turning on the press.
- Preheat Thoroughly: Plug in your single panini press and allow it to preheat fully. This usually takes 3-5 minutes, and many models have an indicator light that signals when it’s ready. Skipping this step can lead to pale, less-than-crispy results.
- Lightly Grease the Plates: For best results and to prevent sticking, lightly brush or spray the cooking plates with a high-smoke-point oil (like olive oil or grapeseed oil) or melted butter. A surprising trick for extra crispness and beautiful browning is to spread a thin layer of mayonnaise on the outside of your bread slices.
- Place Your Sandwich: Carefully open the press and place your assembled sandwich onto the bottom plate. Ensure it’s centered for even cooking.
- Press and Cook: Gently close the lid, allowing the top plate to rest on the sandwich. If your press has a floating hinge, it will adjust automatically. For models with lighter lids, you might apply a slight, even pressure on the handle for the first 30 seconds to ensure good contact and those desired grill marks. Cook for 3 to 7 minutes, depending on the thickness of your sandwich and your desired level of crispness and meltiness. Keep an eye on it to prevent over-browning.
- Remove and Enjoy: Once golden brown with melted cheese (if applicable), carefully remove your panini using a spatula. Let it cool for a minute or two before slicing to allow the fillings to set.
Beyond the Classic: Delicious Single Panini Recipes and Creative Ideas
The beauty of a single panini press lies in its versatility. While a classic ham and cheese is always a winner, don’t be afraid to experiment!
Basic Panini Staples
- The Ultimate Grilled Cheese: Slices of cheddar, Swiss, or provolone on sourdough or ciabatta.
- Turkey Pesto: Sliced turkey, provolone, and basil pesto on focaccia.
- Caprese: Fresh mozzarella, sliced tomatoes, fresh basil, and a drizzle of balsamic glaze on ciabatta.
Creative Variations
- Roasted Veggie Panini: Grilled zucchini, bell peppers, eggplant, and goat cheese on whole wheat bread.
- Breakfast Panini: Scrambled eggs, cooked bacon or sausage, and cheddar cheese on an English muffin or brioche.
- Spicy Chicken Panini: Cooked chicken breast, pepper jack cheese, and jalapeños with a spicy aioli.
- Sweet Treats: Nutella and banana slices on brioche bread, or cream cheese and berries for a dessert panini.
Expert Tips and Tricks for Panini Perfection
“The secret to a truly outstanding panini isn’t just about the ingredients,” says Chef Isabella Rossi, a renowned Italian culinary expert. “It’s about coaxing out their best through proper pressing and heat. Always ensure your press is fully preheated for that initial sizzle, and don’t be shy about experimenting with different breads – they each offer a unique texture when pressed.”
- Don’t Overstuff: While tempting, too many fillings can prevent even toasting and cause spillage.
- Choose the Right Bread: Sturdy breads like ciabatta, sourdough, focaccia, or even thick-cut sandwich bread work best. They hold up well under pressure and crisp beautifully.
- Layer Smartly: Place cheese close to the bread for maximum melt. Distribute fillings evenly.
- Coat the Exterior: As mentioned, a thin layer of olive oil, melted butter, or even mayonnaise on the outside of the bread ensures a golden, crispy crust and prevents sticking. Mayonnaise, in particular, offers fantastic browning without a greasy feel.
- Clean As You Go: A quick wipe with a damp cloth after each use (once the plates have cooled slightly but are still warm) can prevent stubborn food buildup.
The Healthy Perks of Homemade Panini & Versatile Uses
Owning a single panini press isn’t just about delicious sandwiches; it’s about embracing healthier and more convenient cooking. When you make paninis at home, you have complete control over the ingredients, allowing you to choose lean meats, fresh vegetables, and whole-grain breads, significantly reducing processed ingredients and unhealthy fats. It’s a quick way to prepare a balanced meal that often requires less oil than pan-frying.
Beyond sandwiches, your single panini press can be a versatile countertop grill:
- Grill Vegetables: Asparagus, bell peppers, zucchini, or onions can be grilled for a healthy side dish or panini filling.
- Cook Meats: Thin cuts of chicken breast, fish fillets, or even hamburger patties can be cooked quickly.
- Make Quesadillas: Simply place a tortilla with your favorite fillings, press, and cook until golden and the cheese is melted.
- Reheat Pizza: Get that fresh-from-the-oven crispiness back!
Serving Your Single Panini: Best Sides and Pairings
A perfectly pressed panini is a meal in itself, but it truly shines when paired with the right accompaniments. For a classic Italian touch, serve it alongside a fresh green salad with a light vinaigrette or a bowl of hearty tomato soup. Chips, pickles, or a simple coleslaw make for excellent diner-style companions. For a lighter, healthier option, consider a fruit salad or a side of grilled vegetables also prepared on your versatile press. Whether it’s a quick lunch or a casual dinner, your single panini press makes crafting a complete and satisfying meal a breeze.
Frequently Asked Questions About the Single Panini Press
What’s the difference between a panini press and a sandwich maker?
Often, the terms are used interchangeably. A panini press specifically refers to a contact grill designed to heat and press sandwiches, typically resulting in a flatter, toasted sandwich with grill marks. Some “sandwich makers” might also seal the edges or cut the sandwich, but the core function of pressing and grilling is the same.
Can I cook raw meat on a panini press?
Yes, you can cook raw meats like thin chicken breasts, fish fillets, or hamburger patties on most panini presses, especially those with adjustable temperature settings. However, always ensure the meat reaches a safe internal temperature.
How do I clean my single panini press?
For presses with non-removable plates, let the plates cool slightly, then wipe them down with a damp cloth or paper towel. For stubborn bits of food, use a silicone spatula. Avoid abrasive cleaners or metal utensils to protect the non-stick coating. If your press has removable plates, they are often dishwasher safe, making cleanup even easier.
Can I use a single panini press as a regular grill?
Absolutely! Many panini presses are designed to function as indoor or contact grills. Some models even open flat, doubling your cooking surface for grilling items like vegetables, burgers, or kebabs. However, they typically won’t achieve the intense searing temperatures of an outdoor grill.
What kind of bread is best for a panini?
Sturdy breads with a good crust and soft interior, such as ciabatta, focaccia, sourdough, or even thick-cut artisan bread, work wonderfully. They withstand the pressing without becoming too dense or falling apart.
Conclusion
The single panini press is far more than just a kitchen gadget; it’s a strategic tool for culinary convenience and creative cooking, especially for those who value efficiency and space. From transforming simple ingredients into a gourmet meal to offering a healthier alternative to traditional frying, its benefits are numerous. By choosing the right model and embracing a few simple techniques, you can enjoy endless variations of crispy, delicious paninis and other grilled delights right from your countertop. So, plug it in, get creative with your fillings, and discover the satisfying crunch and melted goodness that only a single panini press can deliver. Your taste buds, and your busy schedule, will thank you.