Ever found yourself craving that perfectly golden, crispy on the outside, and wonderfully warm on the inside sandwich? The kind with irresistible grill marks that make it look straight out of a bustling Italian café? If so, you’re ready to dive into the world of the Panini Press Toaster. This versatile kitchen appliance is more than just a sandwich maker; it’s a gateway to gourmet grilled creations, transforming your meals with convenience and a touch of culinary flair. Whether you’re a seasoned chef or a kitchen novice, a panini press toaster can elevate your everyday eating experience.
What Exactly is a Panini Press Toaster and Why Do You Need One?
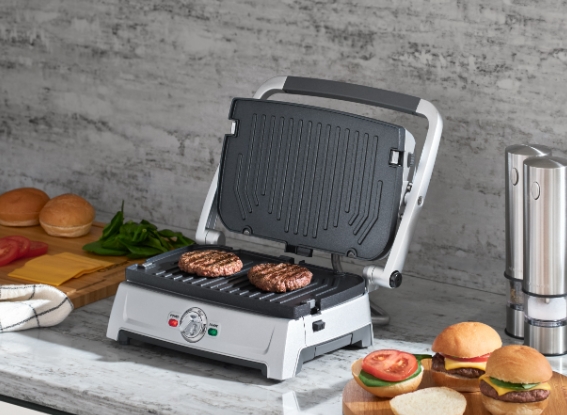
At its heart, a panini press toaster is an electric grill designed to simultaneously toast and press sandwiches, as well as a variety of other foods, between two heated plates. Unlike a standard toaster that simply browns bread or a toaster oven that bakes, a panini press toaster applies direct heat and pressure from both the top and bottom. This unique dual action results in that signature crispy crust and perfectly melted, gooey interior that defines a great panini.
Why should you consider adding one to your kitchen arsenal? For starters, it’s a powerhouse of efficiency. You can achieve restaurant-quality grilled sandwiches in mere minutes, far faster than trying to mimic the effect with a pan and a spatula. The direct heat also ensures even cooking and impressive grill marks that tantalize both the eyes and the taste buds. Beyond sandwiches, its capabilities extend to grilling vegetables, meats, quesadillas, and even omelets, making it a true multi-tasker that saves you time and effort.
The Evolution of the Panini Press: From Italian Cafés to Your Kitchen Counter
The word “panini” is Italian for “small breads” or “bread rolls,” and the concept of grilled sandwiches has roots deep in Italian culinary tradition. Originally, these delectable sandwiches were often made by pressing them on a grill or a hot plate with a heavy object on top. Over time, as food culture evolved and home cooking became more sophisticated, the need for a dedicated appliance emerged.
The modern panini press toaster, as we know it today, combines the efficiency of electric heating with the pressing action required for a truly authentic panini. Early models were often simple, but today’s appliances boast features like adjustable temperature controls, floating hinges to accommodate varying sandwich thicknesses, and non-stick plates for effortless cooking and cleanup. This evolution has transformed a humble kitchen tool into a versatile staple, capable of handling everything from a simple grilled cheese to an elaborate gourmet creation.
Choosing Your Perfect Panini Press Toaster: Types and Features to Consider
Selecting the right panini press toaster can feel daunting with so many options available. However, understanding the different types and key features will help you find the perfect fit for your cooking needs and kitchen space.
Dedicated Panini Presses
These appliances are specifically designed for grilling and pressing. They often feature ribbed plates, which create those iconic grill marks, or sometimes flat plates for a broader contact surface. Look for models with a “floating hinge” design, as this allows the top plate to rest evenly on sandwiches of different thicknesses, ensuring consistent pressure and browning. Adjustable temperature controls are a huge plus, giving you precise command over how crispy or gently toasted your food becomes. Non-stick coatings are standard, but removable plates take cleanup to the next level of ease, often making them dishwasher-safe. Size is also a consideration; some models can press one or two sandwiches, while larger units accommodate family-sized meals.
Multi-functional Grill & Toaster Combos
Some innovative kitchen appliances integrate a panini press function alongside other capabilities like a traditional slot toaster or a full-surface electric grill. These units are fantastic for saving counter space and maximizing versatility. For instance, some may “flip” from a vertical toaster to a horizontal grill, offering a range of cooking modes. While incredibly convenient, ensure that the panini press function itself is robust and offers adequate heat and pressure for true panini results.
Toaster Accessories
A niche category involves specialized inserts that fit into standard slot toasters to make pressed sandwiches. While these can be a clever solution for very small kitchens, they typically don’t offer the same level of heat, pressure, or cooking surface area as a dedicated panini press toaster. For serious panini enthusiasts, a standalone unit is generally preferred.
When making your choice, prioritize features like wattage (higher wattage usually means faster heating), indicator lights (to tell you when it’s preheated and ready), and compact designs for easy storage.
How to Use Your Panini Press Toaster for Culinary Perfection
Using a panini press toaster is wonderfully straightforward, but a few simple steps can ensure consistently perfect results.
Essential Prep Steps
First things first, make sure your panini press toaster is clean. A quick wipe-down with a damp cloth is usually all it takes for non-stick surfaces. Next, and this is crucial, preheat your press. Just like an oven, a panini press needs to reach its optimal temperature before food goes in. Most models have an indicator light that tells you when it’s ready, usually after about 5 minutes. A medium to high temperature, typically between 325°F and 375°F, is ideal for most sandwiches, ensuring a crispy exterior without burning.
Assembling Your Masterpiece
While your press is preheating, assemble your sandwich. The beauty of a panini is its flexibility, but a few tips help. Choose sturdy bread like ciabatta, sourdough, focaccia, or even thick-cut sliced bread, as delicate breads can get too compressed. Layer your fillings without overstuffing – too much can prevent even heating and make closing the press difficult. For that ultimate golden crunch, lightly brush the outer sides of your bread with olive oil or butter. This not only enhances flavor but also creates a beautiful, even toast.
The Pressing Moment
Once your panini press toaster is preheated and your sandwich is assembled, carefully place the sandwich onto the bottom plate. Gently close the lid, allowing the floating hinge to adjust to the sandwich’s thickness. Avoid slamming the lid, as this can squish your fillings out. Cooking times vary depending on the thickness of your sandwich and your desired level of crispness, but typically range from 3 to 7 minutes. Keep an eye on it until the bread is golden brown and the cheese (if using) is gloriously melted.
Post-Press Perfection
When your panini reaches perfection, carefully lift the lid using the cool-touch handle. Use a non-scratch spatula to remove the hot sandwich. It’s often best to let it rest for a minute or two before slicing, as this helps the fillings set and prevents them from spilling out. Cut diagonally for a classic presentation, and get ready to enjoy!
Beyond the Basics: Delectable Panini Recipes and Creative Twists
The panini press toaster is your canvas for culinary creativity. While classic Italian-inspired sandwiches are a given, don’t limit yourself.
The Classic Grilled Cheese Panini
Sometimes, simple is best. Two slices of your favorite bread, a generous helping of cheddar, Gruyère, or Monterey Jack cheese, and a brush of butter or mayo on the outside. Press until golden and gooey. It’s comfort food elevated.
Mediterranean Veggie Panini
For a lighter, yet incredibly flavorful option, try layering grilled zucchini, roasted red peppers, spinach, crumbled feta, and a dollop of hummus or pesto between ciabatta. This is a fantastic way to enjoy fresh vegetables with a satisfying crunch.
Gourmet Turkey & Provolone Panini
Think deli-style, but better. Sliced turkey breast, sharp provolone, sun-dried tomato spread, and some fresh basil leaves on sourdough or focaccia make for an exquisite lunch. Add a sprinkle of red pepper flakes for a kick!
Sweet Panini Delights
Who says paninis are only for savory? Try a dessert panini with Nutella, sliced bananas, and marshmallows. Or, for a fruitier twist, use cream cheese, berries, and a drizzle of honey. The warm, gooey interior of a sweet panini is an unexpected treat.
Tips and Tricks for Panini Press Toaster Mastery
To truly become a panini press toaster maestro, here are a few expert tips:
- Don’t Overfill: This is a common mistake. An overstuffed sandwich won’t press evenly, and fillings are more likely to escape. Less is often more.
- Even Pressure: While many modern presses have floating hinges, for some models, you might need to apply a gentle, even pressure to the lid for the first minute or so to ensure good contact.
- Butter or Oil is Your Friend: Always brush the outside of your bread with a thin layer of olive oil or butter. This creates that desirable golden, crispy crust and prevents sticking.
- Experiment with Breads: Don’t stick to just one type. Ciabatta, focaccia, sourdough, rye, even wraps or tortillas can all be transformed.
- Clean While Warm: The easiest time to clean your panini press toaster is usually when it’s still slightly warm (but unplugged!). Stuck-on bits wipe away much more easily before they cool and harden.
The Panini Press Toaster Lifestyle: Health Benefits and Home Convenience
Beyond the delicious results, incorporating a panini press toaster into your kitchen offers significant lifestyle advantages. For busy individuals or families, it’s a go-to for quick meals. A warm, satisfying panini can be ready in the time it takes to brew a cup of coffee.
It also encourages healthier eating. By grilling at home, you have full control over ingredients. Opt for whole-grain breads, lean proteins, and plenty of fresh vegetables. You can use minimal oil for cooking, making it a lighter alternative to frying. “Making meals at home with a panini press is fantastic for both convenience and health,” notes Chef Isabella Rossi, a renowned culinary expert. “It empowers you to create delicious, wholesome dishes quickly, reducing reliance on takeout and processed foods.”
Furthermore, for those with limited kitchen real estate, many panini press toaster models are designed to be compact and store upright, taking up minimal cabinet or counter space. Multi-functional units further consolidate appliances, streamlining your kitchen.
Frequently Asked Questions About Panini Press Toasters
Got burning questions about your panini press toaster? We’ve got answers!
Q: Can I put raw meat in a panini press?
A: Yes, many panini presses are powerful enough to cook raw meat like chicken breasts or thinly sliced steak. However, ensure the meat is fully cooked through by checking its internal temperature with a thermometer. For thicker cuts, it’s often best to pre-cook them slightly or slice them very thin.
Q: How do I clean my panini press toaster?
A: The easiest way is to unplug it and wipe the non-stick plates with a damp cloth or paper towel while the press is still warm. For stubborn bits, a plastic scraper can help. If your model has removable plates, they can often go in the dishwasher. Never submerge the entire appliance in water.
Q: What’s the best temperature for a panini?
A: A medium-to-high temperature, generally between 325°F and 375°F (160°C-190°C), is ideal. This range ensures a crispy exterior and melted interior without burning the bread.
Q: Can I use any type of bread for a panini?
A: While sturdy breads like ciabatta, focaccia, and sourdough are classic choices because they hold up well to pressing, you can experiment with many types. Thicker-sliced sandwich bread, pita bread, tortillas, and even croissants can make delicious paninis. Avoid very delicate or thin breads that might get too brittle.
Q: What’s the difference between a panini press and a sandwich maker?
A: These terms are often used interchangeably, but historically, a sandwich maker might refer to an appliance that seals the edges of a sandwich (like a pie iron or a deep-fill toastie maker), whereas a panini press typically flattens and grills the entire sandwich surface, creating grill marks. Many modern appliances combine aspects of both, offering a “sandwich press” or “panini press” function that grinds and presses.
Q: Can I make waffles in a panini press toaster?
A: Some multi-functional panini presses come with interchangeable plates, including waffle plates. If your specific model offers this, then yes! Otherwise, a standard panini press, designed for grilling, won’t produce traditional waffles.
Embrace the Panini Lifestyle
The panini press toaster is truly a fantastic addition to any kitchen. It promises not just convenience and speed, but also an exciting versatility that allows you to explore endless culinary possibilities, from a comforting grilled cheese to sophisticated gourmet sandwiches and beyond. It’s an investment in deliciousness, transforming simple ingredients into memorable meals with those irresistible grill marks. So, go ahead, get creative, and let your panini press toaster open up a world of perfectly pressed, toasted delights. Happy grilling!