Imagine a world where perfectly toasted, warm, and utterly delicious sandwiches are just minutes away, right in your own kitchen. This isn’t a dream; it’s the everyday reality for anyone who owns a high-quality Panini Press Sandwich Maker. More than just a simple kitchen gadget, this versatile appliance transforms ordinary ingredients into gourmet delights, making it a must-have for busy weeknights, leisurely brunches, or simply satisfying a craving for something warm and comforting. It’s the secret to creating restaurant-style paninis and so much more, bringing that café experience directly to your countertop.
What is a Panini Press Sandwich Maker and Why You Need One?
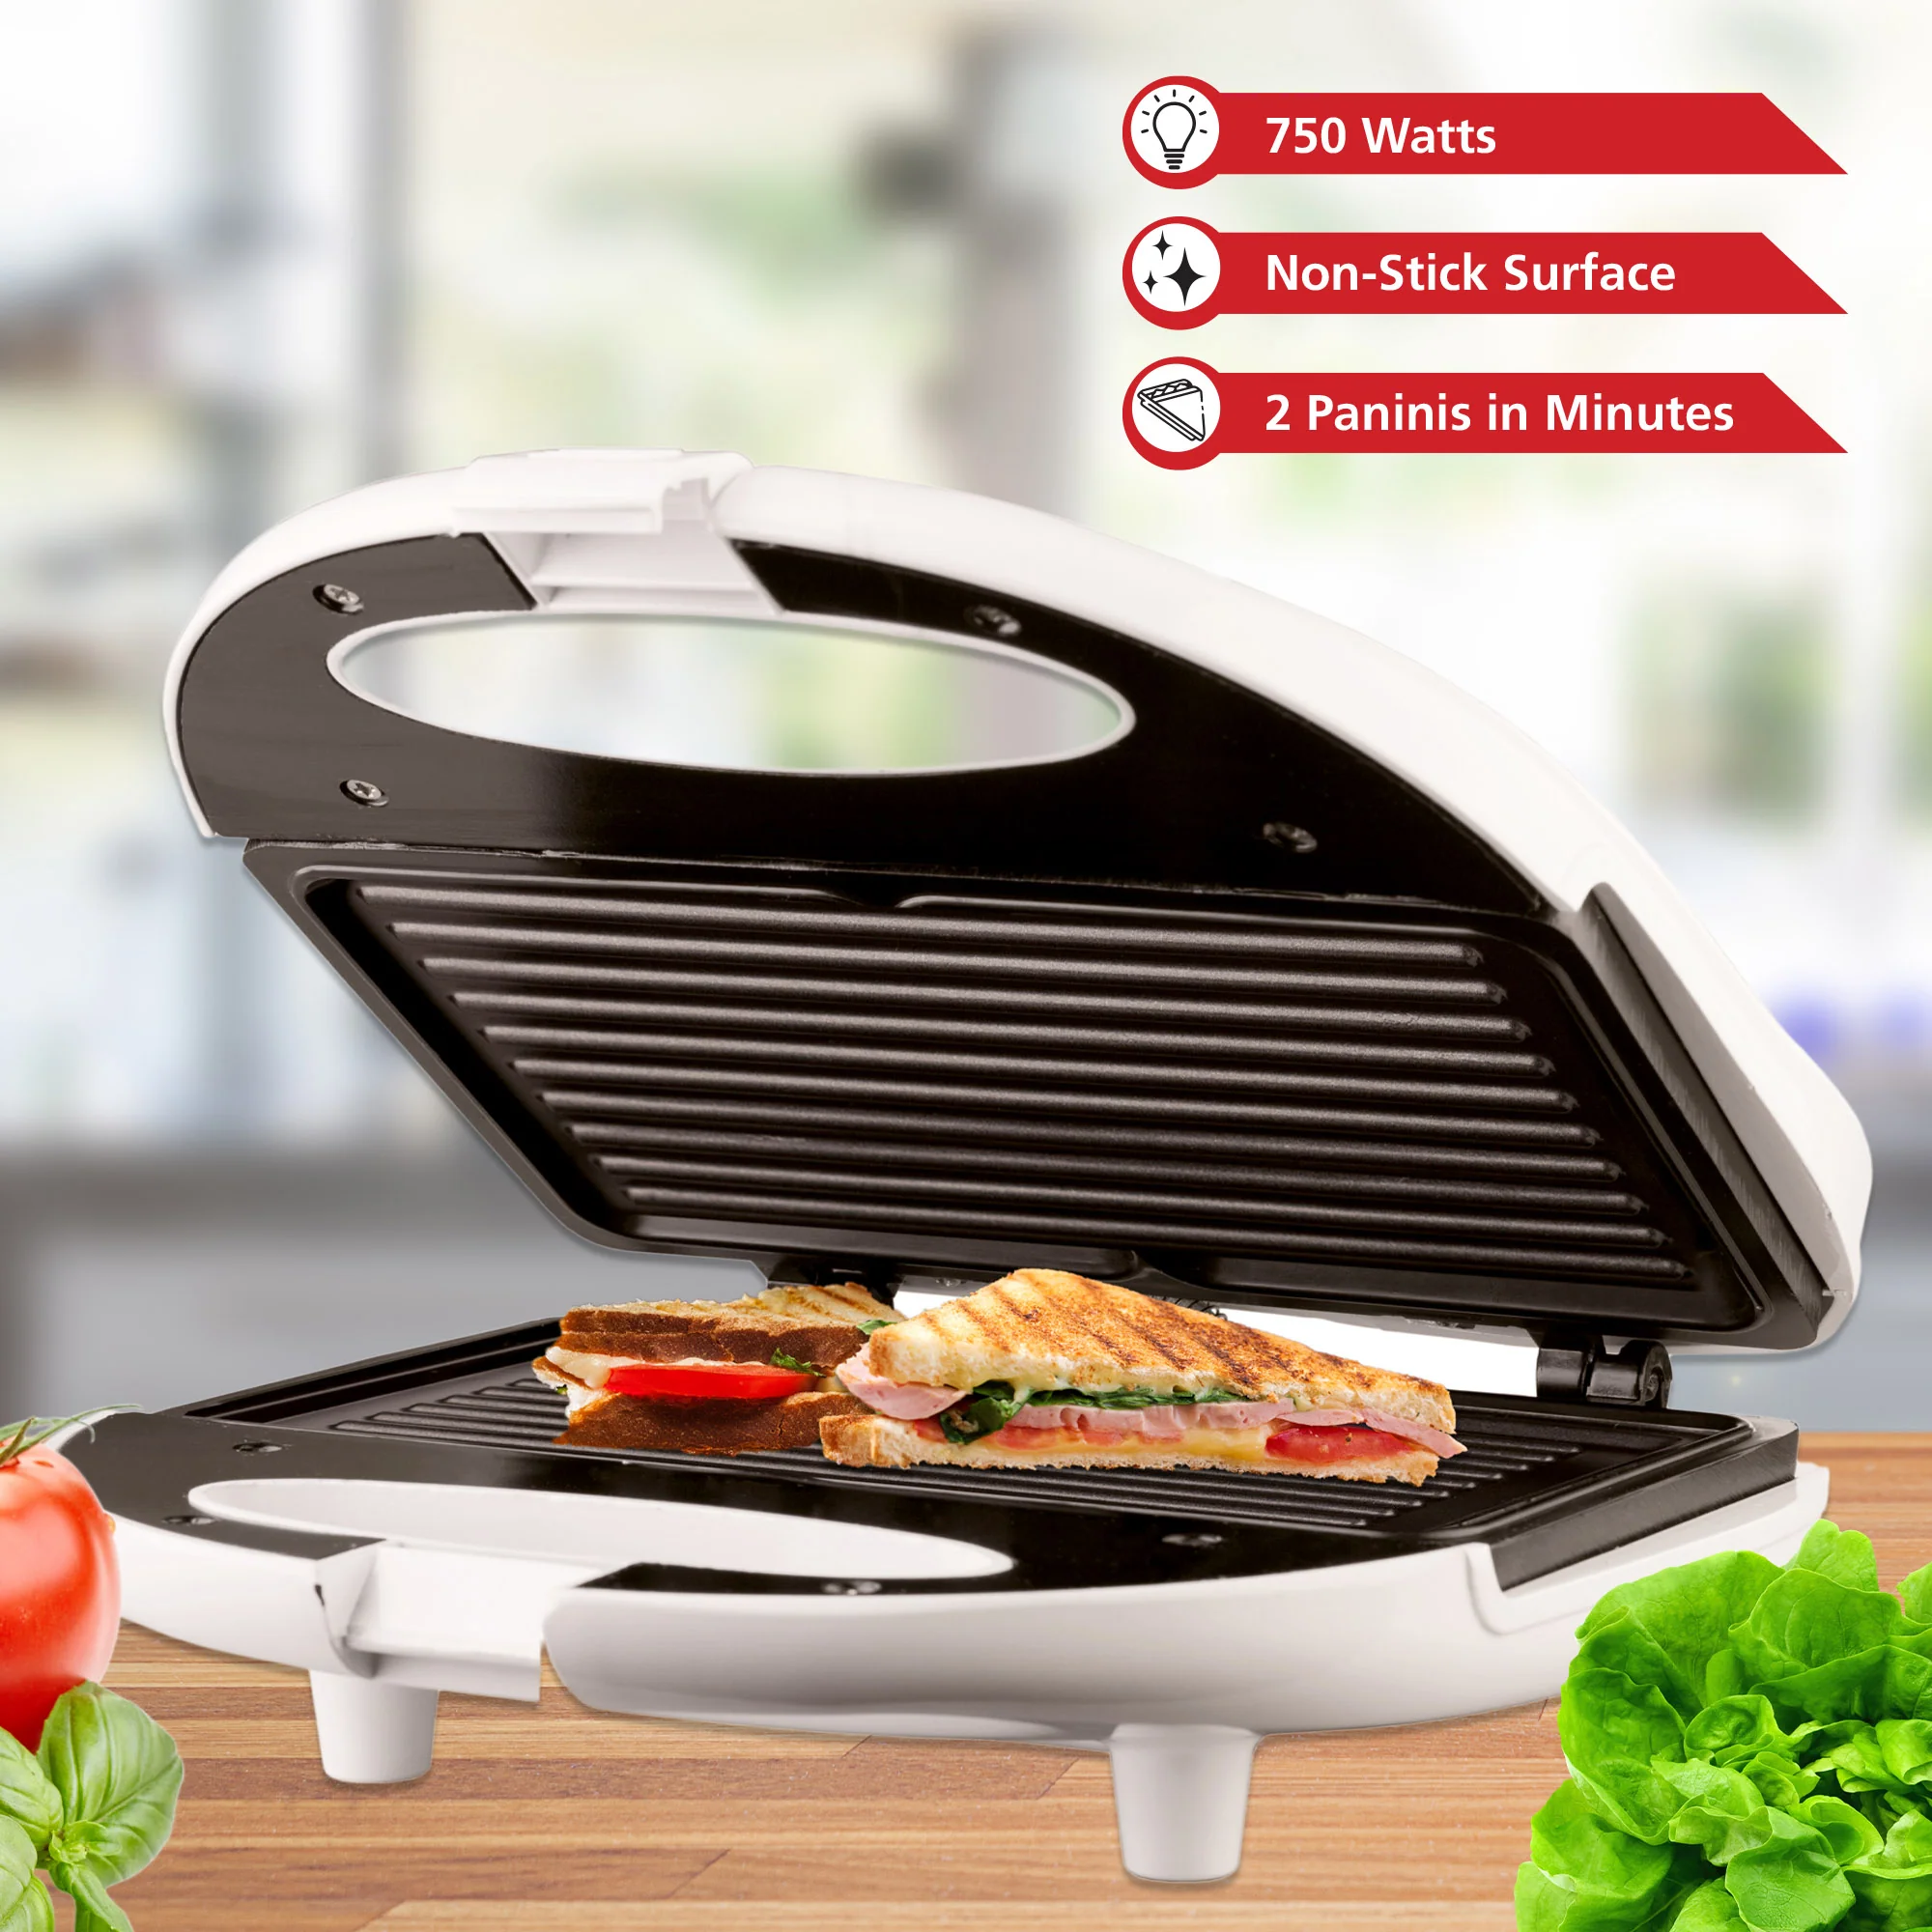
At its core, a panini press sandwich maker is an electric countertop grill designed to toast and warm sandwiches and other foods using direct heat from both its top and bottom plates. What sets it apart is the gentle pressure it applies, pressing your ingredients together while simultaneously heating them, resulting in that signature crispy exterior and warm, often gooey interior. The distinctive grill marks left on the bread are the hallmark of a true panini, making every bite visually appealing and texturally satisfying.
You need one of these fantastic devices because it’s a culinary multitasker. It’s perfect for whipping up quick, wholesome meals that are a step above your average sandwich. Think about those busy mornings or afternoons when you crave something substantial but lack the time for elaborate cooking. A panini press delivers speed and flavor, turning simple components into a satisfying meal in mere minutes. It allows you to experiment with countless fillings, from classic Italian combinations to creative breakfast concoctions, expanding your culinary horizons without requiring complex skills or specialized equipment. It’s akin to having a personal chef for toasted treats, making everything from a quick snack to a hearty dinner a breeze. If you’ve ever considered a panini press toaster, then a dedicated panini press sandwich maker takes the concept to the next level with its focused design and capabilities.
The Evolution of the Panini Press
While the concept of grilled sandwiches has existed for centuries, the modern panini press as we know it gained popularity in Italy in the 1970s and quickly spread across Europe and North America. Originally, paninis were often made in conventional indoor grills or even on stovetop griddles with a heavy weight placed on top. The dedicated electric panini press, however, streamlined this process, making it incredibly convenient and consistent. These early models laid the groundwork for the versatile machines available today, which boast improved features like non-stick surfaces, adjustable temperature controls, and even interchangeable plates, moving beyond just simple sandwich making to become true kitchen powerhouses.
Choosing Your Perfect Panini Press: Types and Features
Selecting the right panini press sandwich maker depends on your cooking habits, kitchen space, and desired versatility. There’s a wide range of models, each offering unique benefits.
Different Types to Consider:
- Basic Panini Presses: These are straightforward, often with fixed plates and a single heat setting, ideal for simple toasted sandwiches.
- Multi-functional Griddlers: Many modern panini presses double as indoor grills and griddles. They often feature plates that can lie flat, effectively doubling your cooking surface for items like pancakes, bacon, or multiple burgers.
- Pocket Sandwich Makers: While distinct, these create sealed, often triangular, sandwiches, but some contact grills blur the lines by offering similar functions.
Key Features to Look For:
- Floating Hinge: This is crucial! A floating hinge allows the top plate to adjust to the thickness of your sandwich, ensuring even pressure and consistent cooking, whether you’re making a thin grilled cheese or a thick Reuben.
- Adjustable Temperature Control: This feature transforms your panini press into a more versatile appliance. Lower temperatures are perfect for delicate items or slow warming, while higher settings are ideal for searing meats or achieving extra-crispy bread.
- Plate Material and Design:
- Non-stick Plates: Essential for easy food release and cleanup. Many modern presses feature durable, PFAS-free ceramic nonstick coatings.
- Ribbed vs. Flat Plates: Ribbed plates create those iconic grill marks, while flat plates provide more uniform browning, similar to a griddle. Many versatile models offer reversible plates (one side ribbed, one side flat) or even interchangeable options.
- Size and Cooking Surface Area: Consider how many sandwiches you typically make at once and your available counter space. Larger surfaces can handle more food, but a compact model might be better for smaller kitchens.
- Removable and Dishwasher-Safe Plates: This is a game-changer for cleanup. Fixed plates can be a hassle to clean thoroughly, while removable plates can often go straight into the dishwasher, saving you time and effort.
- Open-Flat Capability: Many advanced panini presses can open 180 degrees, allowing you to use both plates as a larger indoor grill or griddle. This significantly expands the range of dishes you can prepare.
For those exploring alternatives, some devices offer a panini press for toaster functionality, but a dedicated machine truly optimizes the pressing and grilling experience.
Mastering Your Panini Press: Effective Usage Guide
Using your panini press sandwich maker is delightfully simple, yet a few pointers can elevate your results.
- Preheat is Key: Always preheat your press thoroughly before placing food on it. Most models have indicator lights to signal when they’ve reached the optimal temperature. This ensures even cooking and prevents food from sticking.
- Prep Your Sandwich: Assemble your sandwich with your desired fillings. Don’t overload it, as this can prevent the press from closing properly and hinder even cooking.
- Lightly Grease (Optional): While many plates are non-stick, a light brush of butter or olive oil on the outside of your bread can enhance crispness and flavor.
- Press and Cook: Carefully place your sandwich on the bottom plate and gently lower the top plate. Cooking times vary depending on the press, thickness of your sandwich, and desired crispness, but typically range from 3 to 7 minutes. Keep an eye on it to prevent burning.
Beyond Sandwiches: Culinary Versatility
Your panini press is far more versatile than just making sandwiches. Get creative!
- Quesadillas: Layer cheese and other fillings between tortillas.
- Burgers & Chicken Breasts: Grill patties or thin chicken breasts for a quick meal.
- Grilled Vegetables: Asparagus, bell peppers, zucchini, or onions can be beautifully charred and softened.
- Breakfast Treats: Cook crispy bacon, hash browns, French toast, or even a quick omelette.
Delectable Panini Recipes: From Classic to Creative
Let’s dive into some mouth-watering ideas for your panini press sandwich maker.
Classic Grilled Cheese Panini
This timeless favorite gets an upgrade.
- Ingredients: 2 slices of your favorite bread (sourdough, white, or whole wheat work well), 2-3 slices of cheese (cheddar, provolone, or a blend), butter or olive oil for brushing.
- Instructions:
- Preheat your panini press.
- Butter one side of each bread slice.
- Place one buttered slice butter-side down on a plate. Layer cheese slices on top, then cover with the second bread slice, butter-side up.
- Carefully transfer to the hot panini press.
- Grill for 3-5 minutes, or until the bread is golden brown and crispy, and the cheese is gloriously melted.
Italian Prosciutto & Mozzarella Panini
“A panini press isn’t just for sandwiches; it’s a gateway to quick, gourmet meals at home, transforming simple ingredients into something extraordinary with its unique blend of heat and pressure,” shares Chef Isabella Rossi, a renowned culinary expert.
- Ingredients: Ciabatta or focaccia bread, fresh mozzarella slices, prosciutto, fresh basil leaves, a drizzle of pesto or olive oil.
- Instructions:
- Spread pesto or olive oil on the inside of both bread halves.
- Layer mozzarella, prosciutto, and basil.
- Assemble the sandwich and press until cheese is melted and bread is crisp, about 5-7 minutes.
Healthy Veggie Panini
A vibrant and nutritious option.
- Ingredients: Whole grain bread, hummus, spinach, sliced bell peppers, zucchini, red onion, feta cheese (optional).
- Instructions:
- Spread hummus on both slices of bread.
- Layer spinach, thinly sliced vegetables, and feta.
- Press until vegetables are tender-crisp and bread is golden, about 4-6 minutes.
Breakfast Panini Ideas
- Egg & Avocado Panini: Scrambled egg, sliced avocado, a dash of hot sauce, and a sprinkle of cheese on an English muffin or sourdough.
- French Toast Panini: Dip bread in an egg mixture, then grill until golden. Fill with cream cheese and berries for a sweet treat.
Tips and Tricks for the Perfect Panini
Achieving panini perfection is a blend of good ingredients and smart techniques.
- Bread Matters: While many breads work, denser breads like ciabatta, sourdough, focaccia, or even thick-sliced artisanal bread hold up best to the pressure and heat, creating a satisfying chew and crunch.
- Don’t Overfill: Too many fillings can prevent even contact with the plates, leading to uneven cooking and spillage. Aim for balanced layers.
- Butter or Oil for Crispness: A light brush of butter or olive oil on the exterior of your bread contributes significantly to a golden, crispy crust.
- Preventing Soggy Sandwiches: If using moist ingredients like tomatoes, consider dabbing them with a paper towel or placing them between layers of cheese or drier ingredients to prevent the bread from getting soggy.
- Cleanliness is Next to Deliciousness: Always clean your panini press after it cools down. If you have removable plates, pop them in the dishwasher. For fixed plates, a damp cloth and a soft brush (often included) are your best friends. “When investing in a panini press sandwich maker, prioritize features like a floating hinge and adjustable temperature,” advises appliance specialist Michael Chen. “These elements are crucial for even cooking and accommodating a variety of foods, making your appliance truly versatile, but don’t forget easy cleaning for long-term enjoyment.”
- Experiment with Cheese: Different cheeses melt at different rates and offer varied flavors and textures. Mozzarella for gooeyness, cheddar for sharp flavor, brie for creamy richness – the choice is yours!
The Home Panini Advantage: Health Benefits and Serving Ideas
Making paninis at home with your panini press sandwich maker offers several compelling benefits, especially when it comes to health. You have complete control over the ingredients, allowing you to choose fresh, wholesome components, opt for whole-grain breads, and manage portion sizes and fat content. This makes it easy to create delicious, healthy meals that fit your dietary preferences.
Paninis are also incredibly versatile in how they can be served. They make fantastic standalone meals, but they also pair wonderfully with a fresh green salad, a cup of homemade soup, or a side of crispy sweet potato fries. For a lighter touch, offer a refreshing fruit salad alongside your panini. The possibilities are endless, making your panini press a central figure in diverse meal planning.
Frequently Asked Questions about Panini Press Sandwich Makers
Q: Can I cook raw meat in a panini press sandwich maker?
A: Yes, many panini presses are powerful enough to cook raw meat like chicken breasts, burger patties, or thin cuts of steak. Ensure the meat is cooked to its safe internal temperature. Using a model with adjustable temperature control is beneficial for this.
Q: How do I clean my panini press?
A: For models with removable plates, simply detach them and wash by hand or in the dishwasher. For fixed plates, wait for the appliance to cool, then wipe the plates with a damp cloth or sponge. For stubborn bits, use a soft spatula or a non-abrasive scrubber. Avoid harsh chemicals or metal scourers that can damage the non-stick coating.
Q: What’s the difference between a panini press and a regular sandwich maker?
A: While both make hot sandwiches, a panini press typically features floating hinges, higher heat, and ribbed plates that leave distinctive grill marks. It’s also often more versatile, capable of grilling meats and vegetables, whereas traditional sandwich makers often seal and cut sandwiches into pockets and are solely for sandwiches.
Q: Do I need to butter or oil the bread?
A: While not strictly necessary due to non-stick plates, lightly buttering or oiling the outside of your bread significantly enhances its crispness and creates a beautiful golden-brown finish and richer flavor.
Q: What kind of bread works best for paninis?
A: Denser, sturdy breads like ciabatta, focaccia, sourdough, rye, or even thick-sliced artisanal white bread are excellent choices. They hold up well under pressure and develop a fantastic crispy texture.
Q: Is a panini press worth buying?
A: Absolutely! For anyone who loves hot sandwiches, seeks quick and versatile meal solutions, or enjoys experimenting with grilled foods, a panini press sandwich maker is a highly worthwhile investment that brings gourmet results to your home kitchen.
Conclusion
The panini press sandwich maker is more than just a kitchen appliance; it’s an invitation to explore a world of quick, delicious, and endlessly customizable meals. From classic grilled cheeses to sophisticated Italian combinations and even healthy veggie options, this versatile gadget empowers you to create restaurant-quality dishes right at home. With its ability to produce perfectly crispy bread, melted fillings, and iconic grill marks, it transforms everyday ingredients into extraordinary culinary experiences. So, fire up your panini press, experiment with flavors, and rediscover the joy of homemade goodness. It’s time to press, grill, and savor every bite.