Imagine stepping into your kitchen and effortlessly crafting a gourmet sandwich with perfectly toasted bread and melted fillings, or searing a juicy steak with tantalizing grill marks – all with one compact appliance. Welcome to the world of the Indoor Grill Panini Press, a versatile powerhouse that transcends the simple sandwich maker, transforming everyday meals into extraordinary culinary experiences. PaniniPro.vn is your ultimate strategic partner in navigating this exciting world, ensuring you unlock the full potential of this kitchen hero, from understanding its intricacies to mastering mouth-watering recipes.
What is an Indoor Grill Panini Press and Why You Need One
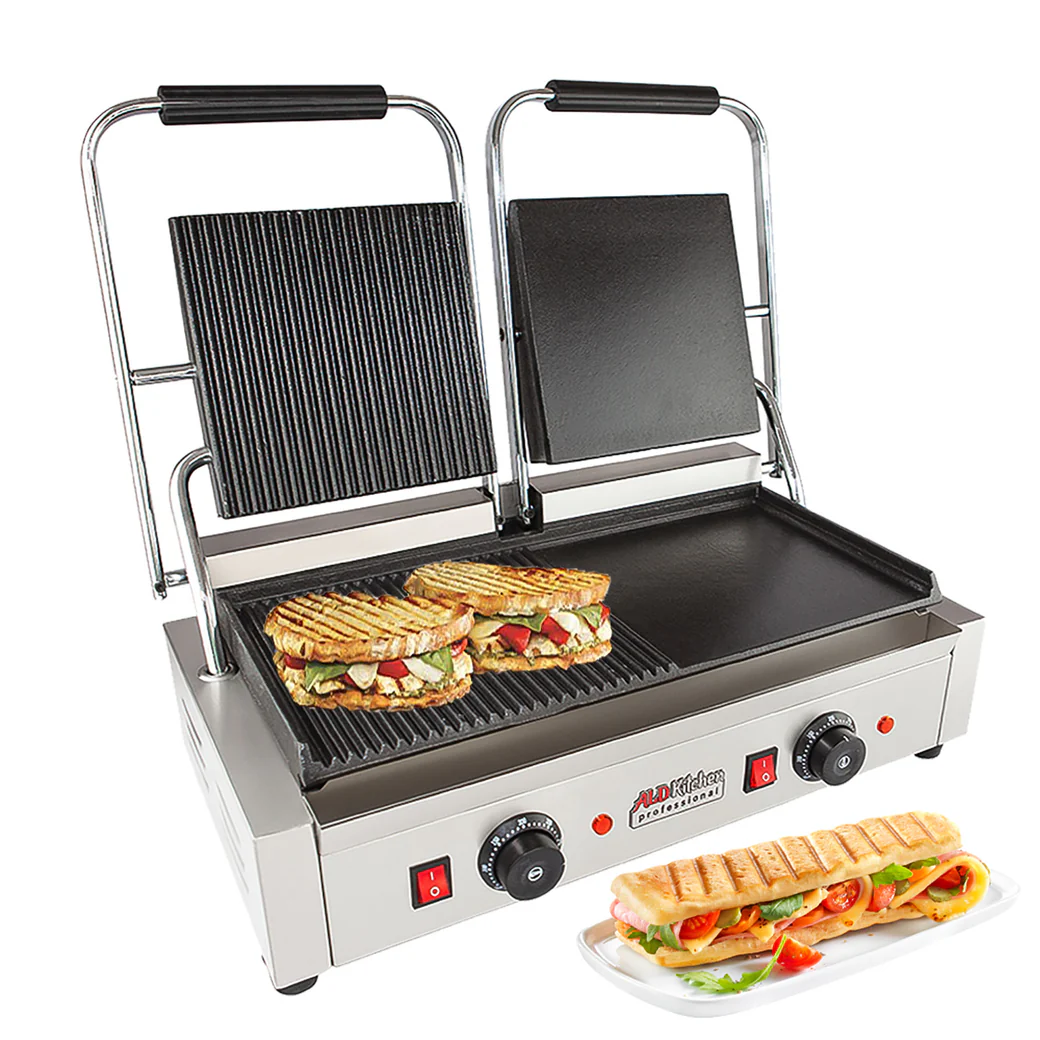
At its core, an indoor grill panini press is an electric appliance designed with two heated, often ridged, plates that cook food simultaneously from both sides. While its name suggests a singular purpose – pressing paninis – its true genius lies in its dual functionality as a contact grill. This means it’s not just for sandwiches; it’s a full-fledged indoor grilling solution.
Why should this be your next kitchen acquisition? The reasons are compelling. First, it offers unparalleled speed and convenience. Meals that might take multiple pans and longer cooking times on a stovetop can be prepared in 10 minutes or less, thanks to the double-sided cooking. Second, it delivers restaurant-quality results right in your home, from the golden-brown crust of a perfect panini to the distinct char marks on grilled vegetables. Third, many models are designed with healthier cooking in mind, featuring grease channeling systems that drain excess fat, making your grilled dishes lighter and more nutritious. Finally, its compact design and upright storage capabilities make it ideal for kitchens of all sizes, offering versatility without sacrificing precious counter space.
The Evolution of the Panini Press: From Cafe Staple to Kitchen Workhorse
The concept of pressing food between hot plates for quick cooking isn’t new. For many, the earliest introduction to such appliances might have been the “Lean Mean Fat-Reducing Grilling Machines” of the late ’90s. These early models popularized the idea of cooking burgers and chicken breasts indoors with minimal fat. However, the panini press, drawing inspiration from Italian cafes where “panini” (meaning small bread rolls) were hot-pressed, refined this concept.
Over time, these presses evolved significantly. What began as simple sandwich makers quickly incorporated features borrowed from dedicated indoor grills. Floating hinges were introduced to accommodate varying food thicknesses, ensuring even pressure and cooking. Non-stick coatings became standard, often migrating to advanced, PFAS-free ceramic materials for both performance and safety. Today’s indoor grill panini presses are the culmination of decades of innovation, designed to be multi-functional appliances that seamlessly transition from making a classic grilled cheese to grilling an entire dinner. They are a testament to the pursuit of efficiency and culinary flexibility in the modern home kitchen.
Types of Indoor Grill Panini Presses and How to Choose the Right One
Navigating the market for an indoor grill panini press can feel overwhelming with the array of options available. To make an informed choice, consider these key features and types:
- Floating Hinge: This is a crucial feature. A floating hinge allows the top plate to adjust to the thickness of your food, ensuring even pressure and consistent cooking, whether you’re pressing a thin quesadilla or a thick burger.
- Plate Material: Most presses feature non-stick plates for easy food release and cleaning. Look for durable, often PFAS-free ceramic non-stick surfaces, which are gaining popularity for their superior performance and health benefits.
- Removable and Reversible Plates: The ultimate in versatility and cleanup! Removable plates can be easily detached and washed, often in the dishwasher. Reversible plates offer a grill surface on one side and a flat griddle surface on the other, expanding your cooking options to include pancakes and eggs.
- Temperature Control: While some basic models are simply plug-and-play, advanced presses offer adjustable temperature dials and even preset functions (e.g., for burgers, chicken, or paninis). Precise temperature control gives you mastery over your cooking results.
- Size and Wattage: Consider your typical serving size and available counter space. Larger presses with higher wattage (e.g., 1400W or more) generally heat faster and maintain consistent temperatures better, ideal for families or those who frequently entertain.
- Drip Trays: Essential for healthier grilling, these trays collect excess grease and fat, making cleanup easier and reducing mess.
- Open-Flat Design: Many versatile models can open 180 degrees, effectively transforming into a larger, flat indoor grill, allowing you to cook more food simultaneously.
When choosing, think about how you’ll primarily use the appliance. If paninis are your main goal, a basic model might suffice. However, if you envision grilling meats, vegetables, and even breakfast items, a more feature-rich “griddler” type with adjustable temperatures and reversible, removable plates, perhaps like a good panini press, will offer greater satisfaction and utility.
“The best indoor grill panini press is the one that fits your lifestyle,” advises Chef Antoine Dubois, a renowned kitchen appliance expert. “Consider not just what you want to cook today, but what culinary adventures you might embark on tomorrow. Versatility and ease of cleaning are often overlooked but are paramount for long-term satisfaction.”
Mastering Your Indoor Grill Panini Press: Effective Usage Tips
Getting the most out of your indoor grill panini press involves a few simple yet crucial techniques:
- Preheating is Key: Always preheat your press thoroughly before placing food on it. Most models have indicator lights that signal when the desired temperature is reached. Proper preheating ensures even cooking, beautiful grill marks, and prevents food from sticking.
- Don’t Overcrowd: Resist the urge to pile too much food onto the plates. Overcrowding can lower the cooking temperature, lead to uneven cooking, and prevent the press from closing properly. Cook in batches if necessary.
- Use Parchment Paper for Easy Cleanup: For particularly messy foods or delicate items like cheese, placing a sheet of parchment paper on both the top and bottom plates before cooking can make cleanup virtually effortless. This also works well for foods that might stick, even on non-stick surfaces.
- Leverage the Floating Hinge: Don’t force thick sandwiches or cuts of meat. Allow the floating hinge to naturally adjust to the food’s thickness. This ensures consistent pressure across the entire surface, resulting in evenly cooked and pressed items.
- Lightly Oil, If Needed: While non-stick surfaces are excellent, a light brushing of olive oil or butter on your bread or meats can enhance browning and flavor, and further prevent sticking.
Beyond Sandwiches: Delicious Recipes for Your Indoor Grill Panini Press
The indoor grill panini press is a culinary chameleon, ready to tackle a vast array of dishes. Here are some ideas to get your creative juices flowing:
Basic Panini Recipes
- Classic Ham & Cheese Panini: Layer quality ham, Swiss or cheddar cheese, a touch of Dijon mustard, and buttered sourdough bread. Press until golden and gooey.
- Caprese Panini: Fresh mozzarella, ripe tomato slices, basil leaves, a drizzle of balsamic glaze, and a brush of olive oil on ciabatta. Simple, yet sublime.
Vegetable Delights
- Grilled Zucchini and Eggplant: Slice vegetables about 1/4 to 1/2 inch thick, toss with olive oil, salt, pepper, and herbs like oregano or thyme. Grill until tender with appealing char marks. These are fantastic as a side dish or added to other paninis.
- Asparagus Spears: Lightly coat asparagus with olive oil and a pinch of salt. Grill for 3-5 minutes until tender-crisp.
Protein Powerhouses
- Juicy Burgers: Form patties, season, and place them on the preheated press. The dual-sided cooking makes quick work of burgers, often cooking them through in under 7 minutes. Add cheese in the last minute for a classic cheeseburger panini.
- Grilled Chicken Breasts: Thinly pound chicken breasts for faster, more even cooking. Season with your favorite rub and grill until cooked through. Perfect for salads or sandwich fillings.
- Steak Slices: Thin cuts of steak can be quickly seared on the indoor grill, offering a convenient way to enjoy grilled steak any time.
Breakfast & Dessert Surprises
- French Toast: Dip slices of bread in an egg and milk mixture, then grill until golden brown. Serve with syrup and berries.
- Cheesy Quesadillas: Sprinkle cheese and your favorite fillings (cooked chicken, peppers, onions) inside tortillas, press until golden and the cheese is melted.
- Mini Cakes in Ramekins: For a truly unique treat, place greased ramekins filled with cake batter onto the press and cook for a delightful, quick dessert.
“The beauty of the indoor grill panini press is its sheer versatility,” says culinary influencer, Isabella Rossi. “From savory to sweet, from a quick snack to a full meal, it invites you to experiment and discover new favorites. Don’t limit yourself to just sandwiches!”
Tips and Tricks for the Perfect Panini and Grilled Meals
Achieving consistent, delicious results from your indoor grill panini press involves a few insider tips:
- Even Browning is Key: For that irresistible golden crust on your panini, lightly butter or brush olive oil on the outer sides of your bread. This promotes caramelization and helps prevent the bread from drying out.
- Preventing Sticking: While non-stick plates are great, ensure they are clean and in good condition. For particularly sticky ingredients, or to extend the life of your non-stick coating, consider using a minimal amount of cooking spray or the parchment paper trick.
- Achieving Distinct Grill Marks: These are the signature of a perfectly grilled item. Make sure your press is fully preheated to the correct temperature. Avoid moving the food once it’s placed on the grill, allowing the heat and pressure to create those desirable ridges.
- Cleaning Hacks: Many modern panini presses, like the breville grill and panini press in stainless steel, boast removable, dishwasher-safe plates, making cleanup a breeze. For models with non-removable plates, wipe them down with a damp cloth or paper towel while still warm (but not hot!) to remove food residue. A rubber spatula can help scrape off stubborn bits. Always ensure the appliance is unplugged and cool before a deep clean.
- Temperature Matters: Experiment with temperature settings. Lower temperatures are ideal for gently heating and melting, while higher temperatures are perfect for searing meats and creating crispy crusts.
The Home Advantage: Healthy and Customizable Options
One of the greatest benefits of owning an indoor grill panini press is the ability to take control of your diet and customize your meals. When you cook at home, you dictate the ingredients, portion sizes, and cooking methods.
- Reduce Unhealthy Fats: By using a grill rather than a frying pan, and with the press’s grease drainage systems, you can significantly cut down on added oils and unhealthy fats.
- Fresh and Wholesome Ingredients: Opt for whole-grain breads, lean proteins, and an abundance of fresh vegetables. You can load your paninis with nutrient-rich ingredients, making them a balanced and satisfying meal.
- Dietary Needs: Easily adapt recipes to meet specific dietary requirements, whether it’s gluten-free bread, dairy-free cheese, or plant-based proteins. The customization options are endless, ensuring healthy eating doesn’t mean sacrificing flavor or variety.
Serving Up Creativity: Panini Pairing and Presentation Ideas
Elevate your indoor grill panini press creations by thinking about presentation and complementary pairings.
- Perfect Pairings: A classic panini pairs beautifully with a fresh green salad, a cup of hearty soup, or a side of crispy sweet potato fries. Grilled vegetables made on the same press can also serve as an excellent healthy side.
- Sauces and Dips: Offer a selection of dipping sauces, such as a tangy aioli, a fresh pesto, or a spicy sriracha mayo, to enhance the flavors of your grilled sandwiches and meats.
- Garnish for Impact: A sprinkle of fresh herbs, a drizzle of balsamic glaze, or a wedge of lemon can add a professional touch and burst of flavor to your dishes. Even simple grill marks are a visual delight!
Frequently Asked Questions (FAQ)
Can an indoor grill panini press be used solely as an indoor grill?
Yes, many models are designed to open flat, providing a larger grilling surface that functions exactly like a traditional indoor grill for meats, vegetables, and more.
What are the benefits of a floating hinge on a panini press?
A floating hinge allows the top cooking plate to pivot and adjust to the thickness of the food being pressed, ensuring even pressure and consistent cooking across items of varying sizes, from thin tortillas to thick sandwiches or steaks.
How do I clean my indoor grill panini press?
For models with removable plates, simply detach and wash them by hand or in the dishwasher. For non-removable plates, wipe them down with a damp cloth or paper towel while the unit is still warm (but unplugged and not scorching hot) to loosen food residue. Always refer to your user manual for specific cleaning instructions.
Can I cook raw meat on a panini press?
Absolutely! An indoor grill panini press is excellent for cooking raw meats like chicken breasts, burger patties, steak slices, and fish fillets. The dual-sided heating ensures thorough cooking, and many models feature grease drainage systems for healthier results.
What kind of bread is best for paninis?
Crusty breads like ciabatta, focaccia, sourdough, or even sturdy artisan loaves work wonderfully for paninis, as they hold up well under pressure and achieve a delightful crispness. However, you can use almost any bread, including softer options like challah or brioche for a richer, sweeter panini.
Conclusion
The indoor grill panini press is far more than a kitchen gadget; it’s a strategic asset for any home cook looking to infuse creativity, convenience, and health into their daily meals. From crafting the perfect grilled sandwich to searing succulent meats and vegetables, this versatile appliance streamlines your cooking process, delivering delicious results every time. PaniniPro.vn is committed to being your trusted guide, inspiring a deeper appreciation for the art of pressed and grilled cuisine. So go ahead, explore the possibilities, experiment with new flavors, and embrace the joy of effortless, restaurant-quality cooking at home. Your culinary adventure with the indoor grill panini press is just beginning!