There’s something uniquely satisfying about a perfectly pressed sandwich: golden-crisp bread, warm gooey fillings, and those irresistible char lines. While many kitchen gadgets promise this delight, the humble yet mighty Cast Iron Panini Press stands as a timeless champion. It’s not just about making a sandwich; it’s about embracing a cooking method that delivers unparalleled flavor and texture, transforming simple ingredients into a gourmet experience right in your kitchen. If you’re ready to elevate your culinary game and discover why generations of cooks have relied on cast iron, you’re in the right place.
What is a Panini Press and Why You Need a Cast Iron One?
At its core, a panini press is a cooking tool designed to grill and flatten sandwiches, creating that signature compressed, toasted result. While electric models are popular, a cast iron panini press offers distinct advantages that truly set it apart. Imagine a tool that holds heat like a culinary vault, distributing it so evenly that every inch of your sandwich browns to perfection. That’s the magic of cast iron. It’s not just about durability; it’s about the consistent, radiant heat that coaxes out flavors, crisps bread beautifully, and leaves those coveted, deep grill marks that say, “This isn’t just a sandwich, it’s an experience.” Unlike lighter materials, cast iron provides substantial weight, pressing your sandwich without you needing to apply extra force, ensuring your fillings meld together perfectly.
Unveiling the Panini Press: A Culinary Evolution
The panini, meaning “small bread” in Italian, has a rich history, evolving from simple bread and cheese to the sophisticated grilled sandwiches we adore today. Historically, cooks would achieve the “pressed” effect using heavy bricks or other makeshift weights over hot pans. The invention of the modern panini press formalized this ancient technique, bringing convenience and consistency to home and commercial kitchens. A cast iron panini press harkens back to these traditional methods, embodying a rustic charm while offering modern efficiency. It’s a nod to culinary heritage, connecting you to generations of cooks who understood the profound impact of robust, heat-retentive cookware.
Choosing Your Companion: Popular Cast Iron Panini Press Types
When it comes to cast iron panini presses, you’ll primarily find stovetop versions. These typically consist of a heavy, ribbed cast iron press designed to be heated separately and then placed atop your sandwich in a matching grill pan or even a regular skillet. This two-piece system allows for incredible versatility, as you can use the grill pan for other cooking tasks when not making paninis. Some presses come pre-seasoned, offering convenience right out of the box, while others might require initial seasoning. You might also encounter options like an enameled cast iron press, which provides a non-stick surface and is easier to clean, though it might not develop the same deep seasoning as bare cast iron. When selecting one, consider the size of your typical sandwiches and whether you prefer the traditional grill marks or a smoother sear, similar to what you’d get from a [flat panini press](https://gemcl.com/flat-panini-press/). For those looking for heavy-duty, commercial-grade performance, options like a [vollrath panini press](https://gemcl.com/vollrath-panini-press/) often feature robust cast iron plates for continuous use, highlighting the material’s strength.
The Art of the Press: Mastering Your Cast Iron Panini Press
Getting the most out of your cast iron panini press involves understanding a few simple, yet crucial, techniques.
Before First Use: Seasoning Secrets
If your cast iron panini press isn’t pre-seasoned, you’ll want to season it before its inaugural use. This process creates a natural, stick-resistant surface and protects against rust. Start by washing the press with warm, soapy water and drying it thoroughly. Then, apply a very thin, even layer of cooking oil (like vegetable or grapeseed oil) to all surfaces. Place the press (and its matching grill pan, if applicable) in a preheated oven, upside down, at 400-450°F (200-230°C) for about an hour. Turn off the oven and let it cool completely inside. Repeat this process two to three times for the best results.
Heating Your Press to Perfection
Proper preheating is key to achieving that perfect sear. Place both your cast iron grill pan and the panini press (if it’s a separate weight) on separate burners over medium heat. Allow them to preheat for about 5-10 minutes, or until a drop of water flicked onto the surface sizzles and evaporates quickly. This ensures both sides of your sandwich will cook simultaneously and evenly, giving you those beautiful, deep grill marks.
Crafting Your Sandwich: Tips for Success
- Don’t overstuff: While tempting, too many fillings can prevent the press from effectively flattening and toasting your sandwich, leading to uneven cooking.
- Oil the bread, not the press: For the best crispy exterior and to prevent sticking, lightly brush the outside of your bread slices with olive oil or spread a thin layer of mayonnaise. Avoid applying oil directly to a bare cast iron press unless it’s very well-seasoned and you’re familiar with its smoking point, as it can cause excessive smoke.
- Placement and pressure: Carefully place your assembled sandwich in the hot grill pan. Then, gently but firmly place the heated cast iron press on top. The weight of the cast iron itself will do most of the work, providing consistent pressure.
- Cooking times: Cook for 3-5 minutes per side, or until the bread is golden brown, crispy, and the cheese (if any) is melted and bubbly. Cooking times will vary depending on your stovetop and the thickness of your sandwich.
Beyond the Bread: Versatile Recipes for Your Cast Iron Panini Press
While a cast iron panini press excels at its namesake, its capabilities extend far beyond sandwiches.
Classic Panini Creations
- Grilled Cheese Supreme: Elevate a classic with sharp cheddar, gruyere, and a touch of mustard.
- Ham & Cheese: Combine quality deli ham with your favorite cheese on sourdough or ciabatta.
- Cubano: Layer roasted pork, ham, Swiss cheese, pickles, and mustard for a truly authentic experience.
- Mediterranean Veggie: A vibrant mix of grilled bell peppers, zucchini, feta, and olive tapenade.
Unexpected Delights: More Than Just Sandwiches
Your cast iron press isn’t just for bread! It’s fantastic for:
- Crispy Bacon: The press flattens bacon, ensuring even cooking and reducing splatter.
- Perfectly Seared Chicken & Steaks: Use it to press boneless chicken breasts or thin cuts of steak for a quick, juicy, and beautifully seared meal with minimal effort.
- Quesadillas: Achieve a perfect crispy tortilla and melted cheese every time.
- Gravlax: Believe it or not, the weight of the press can even be used to cure salmon in the fridge!
Expert Tips for the Perfect Panini Every Time
To truly master your cast iron panini press, consistency and care are key.
- Maintain Seasoning: Regularly re-season your press as needed, especially if food starts to stick. A well-maintained seasoning layer improves performance and flavor.
- Clean After Use: While still warm (but not scorching hot), scrape off any food remnants. Wash with warm water and a stiff brush or non-abrasive sponge. Avoid harsh detergents that strip seasoning. Dry immediately and thoroughly to prevent rust, then apply a very thin coat of oil before storing. Never use cold water on a hot cast iron press, as it can cause warping or cracking.
- Even Heat is Your Friend: Always ensure your press and pan are evenly heated. Uneven heating can lead to some parts of your sandwich being charred while others remain pale.
- Experiment with Bread: Different breads offer different textures. Ciabatta is a classic, but try sourdough, focaccia, or even thick-cut sliced bread.
- Expert Insight: Chef Anya Sharma, a culinary expert and seasoned cast iron user, often advises, “A well-loved cast iron panini press isn’t just a tool; it’s a legacy. With proper care and understanding of its unique heat, you unlock a world of culinary possibilities, far beyond a simple sandwich.”
Why Go Homemade? Health and Happiness with Your Panini Press
Making paninis at home with a cast iron panini press isn’t just a fun cooking adventure; it also offers significant benefits for your health and well-being. You have complete control over the ingredients, allowing you to choose fresh, high-quality components, reduce processed foods, and manage fat and sodium content. Opt for whole-grain breads, lean proteins like grilled chicken or turkey, and a rainbow of fresh vegetables to create delicious, healthy meals tailored to your taste. Plus, there’s an undeniable satisfaction that comes from crafting something wonderful with your own hands.
Serving Up Sensation: Panini Pairing and Presentation
A beautifully pressed panini deserves equally thoughtful accompaniments. Serve your crispy creations alongside a fresh green salad with a light vinaigrette, a comforting bowl of tomato soup, or a vibrant fruit salad. For extra flair, offer a selection of dipping sauces like pesto, marinara, or a creamy sriracha mayo. Don’t forget to cut your paninis diagonally to showcase the delightful layers inside—it makes them easier to eat and more appealing!
Frequently Asked Questions
How do I clean my cast iron panini press?
After each use, while the press is still warm, scrape off any food residue. Wash with warm water and a non-abrasive scrubber. Dry immediately and thoroughly, then apply a thin layer of cooking oil to prevent rust and maintain seasoning. Avoid dish soap if your press is bare cast iron and well-seasoned, but it’s okay for enameled cast iron.
Can I use my cast iron panini press on an induction cooktop?
Yes, most cast iron panini presses are compatible with induction cooktops, as cast iron is a ferrous metal and will respond to the magnetic field generated by induction.
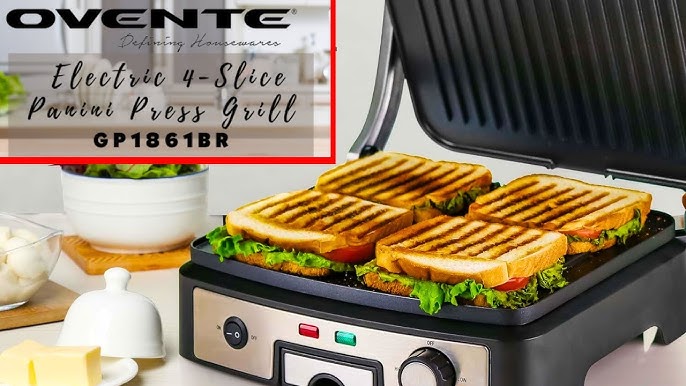
What’s the difference between a cast iron and an electric panini press?
A cast iron panini press typically requires a stovetop and uses the pan’s heat, providing superior heat retention, even cooking, and intense browning. Electric presses are self-heating, often have two hinged plates for top and bottom cooking, and may offer more convenience but sometimes lack the extreme heat and durability of cast iron.
How do I prevent my panini from sticking?
Ensure your press is well-seasoned (if bare cast iron) and properly preheated. Always brush the outside of your bread with olive oil or mayonnaise before pressing, as this helps create a crispy crust and prevents sticking.
Can I cook other foods besides sandwiches?
Absolutely! Your cast iron panini press is incredibly versatile. You can use it to flatten and cook bacon, sear chicken breasts or thin steaks, grill vegetables, or even make quesadillas and wraps.
How long does it take to cook a panini?
Typically, a panini in a cast iron press will cook in about 3 to 7 minutes, depending on the heat of your stovetop and the thickness of your sandwich. Look for a golden-brown, crispy exterior and melted, heated fillings.
Conclusion
The cast iron panini press is more than just a kitchen gadget; it’s an investment in countless delicious meals and a testament to enduring quality. Its ability to retain and distribute heat evenly ensures every sandwich you create is a masterpiece of texture and flavor. From the classic grilled cheese to innovative pressed dishes, this versatile tool empowers you to explore a world of culinary possibilities, all while bringing the comforting warmth of homemade goodness to your table. Embrace the tradition, master the technique, and let your cast iron panini press inspire a love for pressed cuisine that lasts a lifetime.