Imagine sinking your teeth into a perfectly pressed, golden-brown sandwich, its interior warm and gooey, with those irresistible grill marks that tell a story of culinary precision. While many electric panini presses flood the market, the KitchenAid Panini Press offers a distinct, time-honored approach to achieving this gastronomic delight. This isn’t just another countertop gadget; it’s a robust cast-iron grill and press designed to elevate your cooktop creations, promising durability, even heating, and truly exceptional results. For those who appreciate the craft of cooking and the enduring quality of cast iron, the KitchenAid Panini Press is an essential tool, transforming everyday meals into gourmet experiences.
|
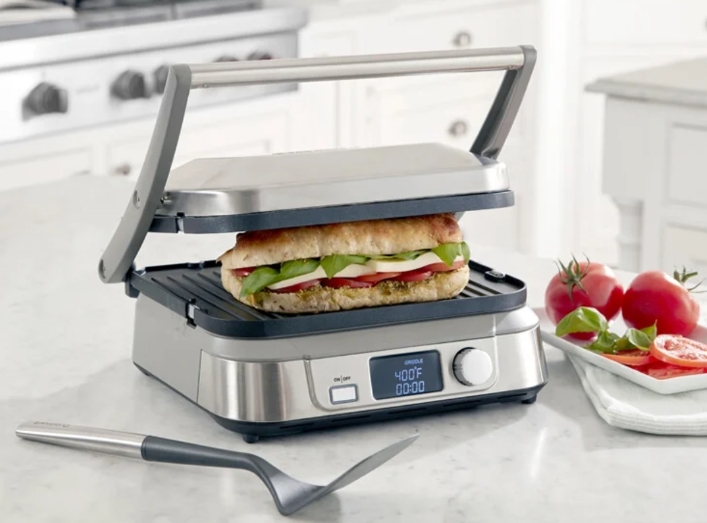
Our Picks for the Best Panini Press in 2026
As an Amazon Associate I earn from qualifying purchases.
|
||
| Num | Product | Action |
|---|---|---|
| 1 | PS PANINI PRESS AND GRILL |

|
| 2 | OSTBA Panini Press Grill with Adjustable Temperature, 4-Slice Indoor Grill, 180° Open Sandwich Maker with Drip Tray, Non-Stick Plates, Stainless Steel, 1200W |
|
| 3 | 3-in-1 Breakfast Station Maker, 110V Electric Griddle Panini Press & Toaster Oven Combo, Retro Household Non-Stick Cooking Plates, Mini Compact breakfast appliance for Small Spaces, Dorms Apartments |
|
| 4 | LỖI |
|
| 5 | Hamilton Beach Panini Press Sandwich Maker & Electric Indoor Grill with Locking Lid, Opens Wide to Fit Any Thickness for Quesadillas, Burgers & More, Nonstick 8\" x 10\" Grids, Chrome (25460AG) |
|
| 6 | Chefman Electric Panini Press Grill and Gourmet Sandwich Maker w/ Non-Stick Coated Plates, Opens 180 Degrees to Fit Any Type or Size Food, Dishwasher Safe Removable Drip Tray, Stainless Steel/Black |
|
| 7 | Electric Panini Press Grill and Sandwich Maker / 8.5\" x 11\" Non-Stick Coated Plates, Opens 180 Degrees to Fit Any Type or Size Food, Dishwasher Safe, Sliver |
|
| 8 | Chefman Panini Press Grill and Gourmet Sandwich Maker Non-Stick Coated Plates, Opens 180 Degrees to Fit Any Type or Size of Food, Stainless Steel Surface and Removable Drip Tray, 4 Slice, Black |
|
| 9 | Cuisinart Electric Griddler FIVE Countertop Grill, Enjoy 5-in-1 Functions Including Panini Press, LCD Display, Wide Temperature Range, and Sear Function, Nonstick Plates, GR-5NAS, Stainless Steel |
|
| 10 | Cuisinart Griddler Indoor Grill, Panini Press, Sandwich Maker & More, 5-in-1 Grilling, Dishwasher-Safe Nonstick Cooking Plates, GR-4NNAS, Stainless Steel |
|
What is a Panini Press and Why You Need the KitchenAid Difference
At its heart, a panini press is designed to toast, grill, and compress sandwiches, melting fillings and crisping bread to perfection. While the term often brings to mind electric appliances, the KitchenAid Panini Press offers a refreshing return to fundamental cooking principles. Crafted from substantial cast iron, this isn’t an electric plug-and-play device. Instead, it’s a heavy-duty press that you preheat on your stovetop, applying consistent, even pressure to whatever delicious creation lies beneath. This manual control gives you an unparalleled level of command over the browning and texture, allowing you to achieve that ideal balance of crispy exterior and tender, melty interior. It’s the kind of tool that truly immerses you in the cooking process, yielding results that speak volumes about quality and care.
The Heritage of Panini and KitchenAid’s Enduring Craftsmanship
The panini, an Italian grilled sandwich, has a rich history rooted in simple, delicious ingredients brought together by heat and pressure. It’s a dish that celebrates both flavor and texture. Just as the panini represents a culinary tradition, KitchenAid has built a legacy synonymous with quality and reliability in the kitchen. Their cast-iron grill and panini press embodies this philosophy, blending traditional materials with thoughtful design for the modern home chef. It’s not about flashy features, but about delivering consistent, superior performance that stands the test of time, much like a perfectly crafted meal.
Understanding Your KitchenAid Panini Press: Features and Design
The KitchenAid Panini Press is a testament to durable, functional design. Its core is crafted from robust cast iron, a material renowned for its exceptional heat retention and even distribution. This means once it’s hot, it stays hot, ensuring your food cooks uniformly. The cooking surface boasts a dark-colored porcelain enamel interior, which not only enhances browning for those coveted grill marks but also provides excellent stain resistance, making it easier to maintain.
Designed for cooktop use, this press is incredibly versatile. You preheat it alongside your skillet or grill pan, allowing it to heat evenly from both sides, then place it directly on your food. Its substantial weight is a key feature, guaranteeing maximum contact between the food and the cooking surface. This heavy-duty pressure ensures thorough cooking and creates those attractive, deeply seared grill lines that are the hallmark of a gourmet panini. For added convenience and safety, it comes with removable silicone grips that protect your hands from the heat. Plus, for those times you need oven-level heat, it’s oven safe up to 500°F (260°C), offering even more flexibility in your cooking methods.
Mastering Your KitchenAid Panini Press: Usage Guide
Using the KitchenAid Panini Press is straightforward and rewarding, offering a hands-on approach to grilling.
Getting Started: Preheating is Key
First, place your cast-iron grill pan or skillet on your stovetop over medium heat. Position your KitchenAid Panini Press directly inside the pan or on an adjacent burner to preheat simultaneously. This ensures both surfaces are hot and ready to deliver even cooking and perfect grill marks. Allow several minutes for the cast iron to heat thoroughly.
Crafting Your Creation
Once your pan and press are hot, lightly brush your bread or food with a little olive oil or butter to encourage browning and prevent sticking. Place your sandwich, burger, or vegetables in the preheated grill pan.
Applying Pressure for Perfection
Carefully position the hot KitchenAid Panini Press directly on top of your food. Its significant weight will apply constant, even pressure, ensuring optimal contact with the heated surface below. Cook for a few minutes on one side until golden brown and grill marks appear, then flip your sandwich and reposition the press to cook the other side if desired. The goal is a beautifully toasted exterior with a thoroughly heated interior.
Versatile Uses Beyond Paninis
Don’t limit yourself to just sandwiches! The KitchenAid Panini Press is fantastic for:
- Burgers: Achieve restaurant-quality sear and even cooking, locking in juices.
- Chicken Breasts: Pressing chicken ensures even thickness and faster, more uniform cooking.
- Stuffed French Toast: Create a perfectly compressed and golden-brown breakfast treat.
- Vegetables: Grill thick slices of eggplant, zucchini, or bell peppers with beautiful char marks.
Delicious Recipes to Try with Your KitchenAid Panini Press
The possibilities are endless with this versatile press. Here are a few ideas to get your culinary juices flowing:
1. Classic Grilled Cheese Panini
A timeless favorite, elevated. Butter two slices of sourdough or artisan bread. Fill with a blend of cheddar, Gruyère, and a touch of mozzarella. Press until golden and gloriously gooey.
2. Mediterranean Veggie Panini
For a healthy and flavorful option, layer roasted red peppers, grilled zucchini slices, fresh spinach, crumbled feta, and a drizzle of balsamic glaze between ciabatta bread. The press will meld the flavors beautifully.
3. Gourmet Chicken & Pesto Panini
Spread basil pesto on ciabatta rolls. Layer with sliced grilled chicken breast, fresh mozzarella, and sun-dried tomatoes. Press until the cheese is melted and bubbling, and the bread is crisp.
4. Pressed Burger Perfection
Form your burger patties to your desired thickness. Cook on a hot grill pan, then use the KitchenAid Panini Press to flatten slightly and ensure an all-over sear, creating a juicy, evenly cooked burger with fantastic texture. Add cheese in the last minute of cooking for a perfect melt.
Tips and Tricks for the Perfect Press
- Choose the Right Bread: Crusty breads like ciabatta, sourdough, or focaccia hold up well under pressure and yield the best texture.
- Don’t Overfill: While tempting, too many fillings can cause spillage and uneven cooking. Aim for a balanced, compact sandwich.
- Lightly Oil/Butter: A thin layer of oil or butter on the outside of your bread promotes browning and prevents sticking to the press.
- Listen and Look: Pay attention to the sizzling and watch for steam. The visual cues will tell you when your panini is perfectly toasted.
- Achieving Optimal Grill Marks: Ensure both your pan and the press are well preheated. The cast iron’s grooves will naturally create those desirable marks.
The Benefits of Cooking with Cast Iron
The KitchenAid Panini Press leverages the inherent advantages of cast iron cookware:
- Even Heat Distribution: Cast iron heats slowly but very evenly, eliminating hot spots and ensuring consistent cooking across the entire surface.
- Superior Heat Retention: It holds heat exceptionally well, making it ideal for maintaining high temperatures for searing and achieving crispy textures.
- Durability for a Lifetime: Properly cared for, cast iron can last for generations, becoming a cherished family heirloom.
- Natural Non-Stick Properties: While the porcelain enamel adds to non-stick, a well-seasoned cast iron base naturally becomes more non-stick over time.
“The beauty of a cast iron press like the KitchenAid lies in its sheer simplicity and effectiveness,” says Chef Isabella Rossi, a renowned culinary instructor specializing in traditional cooking methods. “It’s a tool that connects you to the food, letting you feel the sizzle and see the transformation. The results – a perfectly seared panini, a juicy pressed burger – are always superior because you control the heat and pressure intimately, rather than relying on automated settings.”
Cleaning and Care for Longevity
Maintaining your KitchenAid Panini Press is surprisingly simple thanks to its porcelain enamel coating.
- Immediate Clean: For easiest cleanup, fill your grill pan with hot water immediately after use and let the press sit in it while it cools slightly. This helps release any stuck-on food.
- Dishwasher Durable: The porcelain enamel interior is designed to be dishwasher safe, offering a convenient cleaning option.
- Hand Washing: For best long-term care, hand wash with warm, soapy water and a non-abrasive sponge. Avoid harsh scrubbers that could damage the enamel.
- Drying and Seasoning: Always dry your cast iron press thoroughly immediately after washing to prevent rust. Some users also like to apply a thin layer of grapeseed oil (or other high smoke point oil) with a pastry brush after drying, wiping off any excess, to maintain the finish and enhance non-stick properties over time.
Frequently Asked Questions
Is the KitchenAid Panini Press electric?
No, the KitchenAid Panini Press is a cast iron grill and press designed for cooktop and oven use. It does not have electrical components or temperature controls; it relies on your stovetop for heat.
What can I cook with my KitchenAid Panini Press?
Beyond paninis and grilled sandwiches, it’s excellent for pressing burgers, chicken breasts, steak, fish, and various vegetables like zucchini, eggplant, and bell peppers. It’s also great for stuffed French toast.
How do I clean a cast iron panini press?
The porcelain enamel interior is dishwasher safe. For hand washing, use warm, soapy water and a non-abrasive sponge, then dry thoroughly to prevent rust. Some users also season it lightly with oil after cleaning.
Do I need to season my KitchenAid Panini Press?
While the porcelain enamel reduces the need for traditional cast iron seasoning, a light coating of high-smoke-point oil after washing and drying can help maintain its finish and enhance its non-stick qualities over time.
What’s the best way to get perfect grill marks?
Ensure both your grill pan (or skillet) and the KitchenAid Panini Press are fully preheated on the stovetop before placing your food. The press’s substantial weight and the hot, grooved surface will naturally create those desirable grill marks.
Conclusion
The KitchenAid Panini Press stands apart in a world of electric gadgets, offering a durable, versatile, and satisfying way to create extraordinary pressed dishes. Its cast-iron construction, even heating, and ability to impart perfect grill marks make it a cherished tool for any home cook passionate about quality ingredients and delicious results. By embracing this robust piece of cookware, you’re not just making a sandwich; you’re crafting a culinary experience. So, fire up your stove, gather your favorite ingredients, and let the KitchenAid Panini Press inspire you to explore the rich flavors and satisfying textures of perfectly pressed meals right in your own kitchen.