Are you ready to transform your kitchen experience and elevate your everyday meals? An electric panini press is more than just a sandwich maker; it’s a versatile countertop appliance that opens up a world of culinary possibilities, from perfectly grilled sandwiches to savory snacks and even quick dinners. Forget soggy bread or unevenly cooked food; with this handy gadget, you’re on your way to crispy, golden perfection every time. Whether you’re a seasoned home chef or just starting your cooking journey, understanding the full potential of an electric panini press can revolutionize your meal prep and inspire delightful new creations.
What Exactly is an Electric Panini Press, and Why Do You Need One?
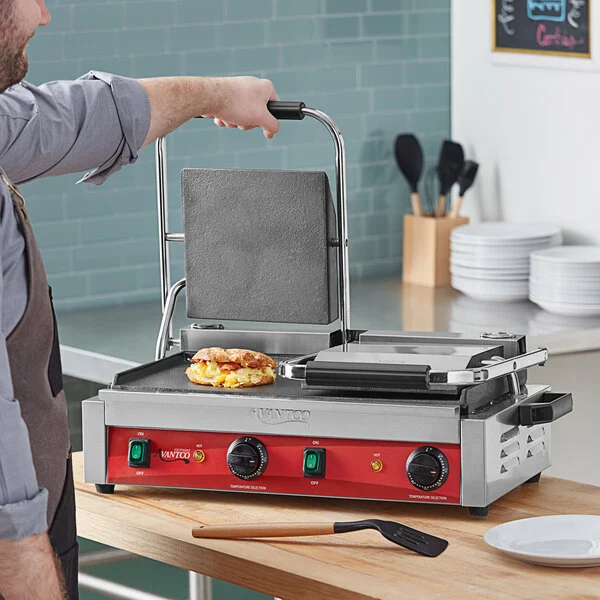
An electric panini press is a specialized grilling appliance featuring two hinged, heated plates that cook food from both sides simultaneously. Unlike a traditional skillet, it applies even pressure and heat, resulting in beautifully browned food with those iconic grill marks.
|
Our Picks for the Best Panini Press in 2026
As an Amazon Associate I earn from qualifying purchases.
|
||
| Num | Product | Action |
|---|---|---|
| 1 | OSTBA Panini Press Grill with Adjustable Temperature, 4-Slice Indoor Grill, 180° Open Sandwich Maker with Drip Tray, Non-Stick Plates, Stainless Steel, 1200W |

|
| 2 | PS PANINI PRESS AND GRILL |
|
| 3 | 3-in-1 Breakfast Station Maker, 110V Electric Griddle Panini Press & Toaster Oven Combo, Retro Household Non-Stick Cooking Plates, Mini Compact breakfast appliance for Small Spaces, Dorms Apartments |
|
| 4 | LỖI |
|
| 5 | Electric Panini Press Grill and Sandwich Maker / 8.5\" x 11\" Non-Stick Coated Plates, Opens 180 Degrees to Fit Any Type or Size Food, Dishwasher Safe, Sliver |
|
| 6 | Chefman Panini Press Grill and Gourmet Sandwich Maker Non-Stick Coated Plates, Opens 180 Degrees to Fit Any Type or Size of Food, Stainless Steel Surface and Removable Drip Tray, 4 Slice, Black |
|
| 7 | Cuisinart Griddler Indoor Grill, Panini Press, Sandwich Maker & More, 5-in-1 Grilling, Dishwasher-Safe Nonstick Cooking Plates, GR-4NNAS, Stainless Steel |
|
| 8 | Cuisinart Electric Griddler FIVE Countertop Grill, Enjoy 5-in-1 Functions Including Panini Press, LCD Display, Wide Temperature Range, and Sear Function, Nonstick Plates, GR-5NAS, Stainless Steel |
|
| 9 | Chefman Electric Panini Press Grill and Gourmet Sandwich Maker w/ Non-Stick Coated Plates, Opens 180 Degrees to Fit Any Type or Size Food, Dishwasher Safe Removable Drip Tray, Stainless Steel/Black |
|
| 10 | Hamilton Beach Panini Press Sandwich Maker & Electric Indoor Grill with Locking Lid, Opens Wide to Fit Any Thickness for Quesadillas, Burgers & More, Nonstick 8\" x 10\" Grids, Chrome (25460AG) |
|
The Journey of the Panini Press: A Brief History
The panini, a humble grilled sandwich, has roots deeply embedded in Italian street food culture. Traditionally prepared with sliced bread (often ciabatta or focaccia), savory fillings, and then pressed on a grill until golden and warm, these sandwiches became a staple for quick, satisfying meals. As Italian cuisine spread globally, so did the love for the panini. However, replicating that authentic cafe-style grilled perfection at home used to require a heavy pan and a brick or another heavy object. The invention of the electric panini press brought this delightful culinary experience into home kitchens with unprecedented ease, evolving from simple sandwich makers to sophisticated multi-functional grills we know today.
Navigating the Options: Choosing Your Perfect Electric Panini Press
Selecting the right electric panini press involves considering a few key factors to match your cooking needs and kitchen space. First, think about the plate type: some presses have ribbed plates that give those classic grill marks, while others offer flat plates for more even heating and versatility (great for pancakes!). Many models even offer a combination or interchangeable plates. The hinge design is crucial too; a floating hinge adjusts to accommodate varying sandwich thicknesses, ensuring even pressure on tall, generously filled creations. Fixed hinges are simpler but less flexible.
Size matters – single sandwich presses are compact, perfect for individuals or small kitchens, while larger double presses can handle multiple items, ideal for families or entertaining. Look for features like adjustable temperature controls, which give you precision over your cooking, ensuring delicate items don’t burn while thicker foods cook through. A non-stick coating is practically a must for easy food release and cleanup, and a drip tray is invaluable for catching excess fats and juices, keeping your countertop tidy. For those looking for a reliable option, exploring a good panini press can provide excellent insights into top-rated models.
Mastering Your Machine: How to Use an Electric Panini Press Effectively
Using an electric panini press is remarkably straightforward, but a few simple steps can elevate your results. First, always preheat your press. Just like an oven, giving it time to reach the desired temperature ensures even cooking and that coveted crispy exterior. Most presses have indicator lights that signal when they’re ready. While it’s heating, prepare your ingredients. Once preheated, lightly oil or butter the exterior of your bread if desired (this helps with browning and crispiness, though many non-stick surfaces don’t strictly require it). Place your sandwich or food item onto the bottom plate, centered for even cooking.
Gently lower the top plate, allowing it to rest on the food. Avoid pressing down with excessive force, especially with a floating hinge, as the press itself will apply adequate pressure. Cook time varies based on your food and desired crispness, but generally, paninis take 3-7 minutes. Keep an eye on the color – golden brown usually indicates perfection. For optimal results, “Chef Isabella Rossi, a renowned Italian-American culinary expert, shares, ‘The beauty of an electric panini press lies in its ability to transform simple ingredients into a gourmet meal with minimal effort. It’s an indispensable tool for any modern kitchen, offering both convenience and culinary creativity.'”
Panini Perfection: Classic Recipes and Creative Twists
The electric panini press is your canvas for culinary creativity. Start with the basics, then branch out!
Classic Cheese Panini
- Ingredients: Slices of your favorite bread (sourdough, ciabatta, or even basic white bread work wonders), slices of cheddar, provolone, or mozzarella.
- Method: Butter the outside of the bread, layer cheese between slices, and press until melted and golden.
Veggie Delight Panini
- Ingredients: Whole wheat bread, grilled bell peppers, zucchini, spinach, a slice of feta or goat cheese, and a drizzle of balsamic glaze.
- Method: Assemble and press for a healthy, flavorful lunch.
Meaty Marvels
- Ingredients: Ciabatta, thinly sliced roast beef or turkey, Swiss cheese, caramelized onions, and a spread of Dijon mustard.
- Method: Press until the meat is warm and the cheese is gooey.
Sweet Endings
- Ingredients: Brioche bread, banana slices, Nutella, and a sprinkle of cinnamon.
- Method: Press until the brioche is warm and slightly crispy, and the Nutella is melted. A truly indulgent treat!
Beyond traditional sandwiches, your panini press can tackle so much more. Think quesadillas, burritos, grilled chicken breasts, fish fillets, burgers, hash browns, and even leftover pizza for a crispy refresh.
Expert Tips and Tricks for Flawless Panini Every Time
Achieving panini perfection consistently is easy with a few insider tips:
- Don’t Overfill: While tempting, packing too many ingredients can prevent the press from closing properly and lead to uneven cooking.
- Butter or Oil for Crispness: A thin layer of butter or olive oil on the outside of your bread not only adds flavor but guarantees a beautifully golden, crispy crust.
- Parchment Paper is Your Friend: For sticky fillings (like cheese that oozes) or to keep your plates super clean, place a sheet of parchment paper over and under your sandwich before pressing. This makes cleanup a breeze!
- Even Thickness: Try to keep your ingredients relatively even in thickness within the sandwich to ensure consistent cooking and pressure.
- Clean Immediately: While the press is still warm (but unplugged), gently wipe down the plates with a damp cloth. This prevents food from hardening and becoming difficult to remove later.
- Experiment with Bread: Don’t limit yourself to just ciabatta. Try sourdough, focaccia, rye, challah, or even tortillas for wraps. For those specifically interested in a popular brand, a breville sandwich panini press is often praised for its even heat distribution and durability.
The Perks of Pressing: Health Benefits and Homemade Delights
One of the significant advantages of owning an electric panini press is the opportunity to make healthier meal choices. Grilling typically requires less oil than pan-frying, and the pressing action helps to render fat from meats, leading to leaner results. Furthermore, making paninis at home gives you complete control over your ingredients. You can opt for whole-grain breads, load up on fresh vegetables, use lean proteins, and manage cheese and sauce portions to fit your dietary needs. This customization allows for endless healthy variations, from low-carb wraps to gluten-free options. It’s also incredibly economical, often costing far less to prepare gourmet-style paninis at home than purchasing them from a cafe, making it a win-win for both your health and your wallet.
Beyond the Plate: Creative Serving and Pairing Ideas
A perfectly pressed panini is delicious on its own, but pairing it with complementary sides and beverages can elevate your meal to a truly satisfying experience.
- Soups: A classic pairing, a warm bowl of tomato soup, minestrone, or a creamy potato soup is the ultimate comfort food companion to a crispy panini.
- Salads: A light, fresh green salad with a vinaigrette dressing provides a refreshing contrast to the rich, warm sandwich.
- Chips and Dips: For a casual touch, serve with a side of your favorite potato or vegetable chips, perhaps with some hummus or a flavorful aioli.
- Fruit: A simple fruit salad or a side of sliced apples offers a sweet and healthy balance.
- Beverages: Iced tea, sparkling lemonade, or even a glass of crisp white wine can beautifully complement the flavors of your panini.
Frequently Asked Questions About Electric Panini Presses
How do I clean my electric panini press?
The easiest way to clean your electric panini press is to wipe it down immediately after use while it’s still warm (but unplugged!). Use a damp cloth or sponge. For stubborn bits, a plastic scraper or a soft brush can help. If your plates are removable and dishwasher-safe, that’s even better!
Can I cook raw meat on a panini press?
Yes, many electric panini presses are powerful enough to cook raw meat like thin chicken breasts, burgers, or fish fillets. However, ensure the meat is cooked through to a safe internal temperature, as indicated by a meat thermometer, before consuming.
What’s the difference between a panini press and a regular grill?
While both cook food with heat, a panini press is designed to apply pressure from both sides simultaneously, making it ideal for pressing sandwiches. A regular grill typically cooks from one side, often without direct pressure from the top. Many panini presses can double as small countertop grills for other items, offering good versatility.
Do I need to use butter or oil?
While not always strictly necessary, especially with good non-stick surfaces, butter or oil on the outside of your bread helps achieve a golden, crispy crust and can add flavor. For most other foods like vegetables or meats, a light brush of oil can prevent sticking and enhance browning.
How long does it take to cook a panini?
Cooking time varies depending on the thickness of your sandwich and your desired crispiness, but most paninis are ready in 3 to 7 minutes. Keep an eye on the browning of the bread and the melty-ness of the cheese!
Conclusion
The electric panini press is far more than a one-trick pony. It’s a versatile, efficient, and enjoyable kitchen appliance that empowers you to create delicious, healthy, and satisfying meals with remarkable ease. From classic Italian grilled sandwiches to creative culinary experiments with various ingredients and even quick weeknight dinners, its potential is truly vast. By understanding its features, mastering basic techniques, and embracing a spirit of culinary adventure, you can unlock a world of flavors right in your own kitchen. So go ahead, plug in your panini press, get creative with your fillings, and enjoy the delightful crunch and warmth of a perfectly pressed meal – it’s an experience that truly reinvents everyday cooking.